Maybe you are just entering the Apple HomeKit universe and have started with a smart light bulb. Now you want to switch it on at a certain time and off again at some point. We show you how to do that – you have to think a little bit around the corner.
The basic trick is that you have to create two separate actions for all time periods that exceed four hours. Yes, for all actions that contain a from-to time slot. It doubles your workload, so to speak.
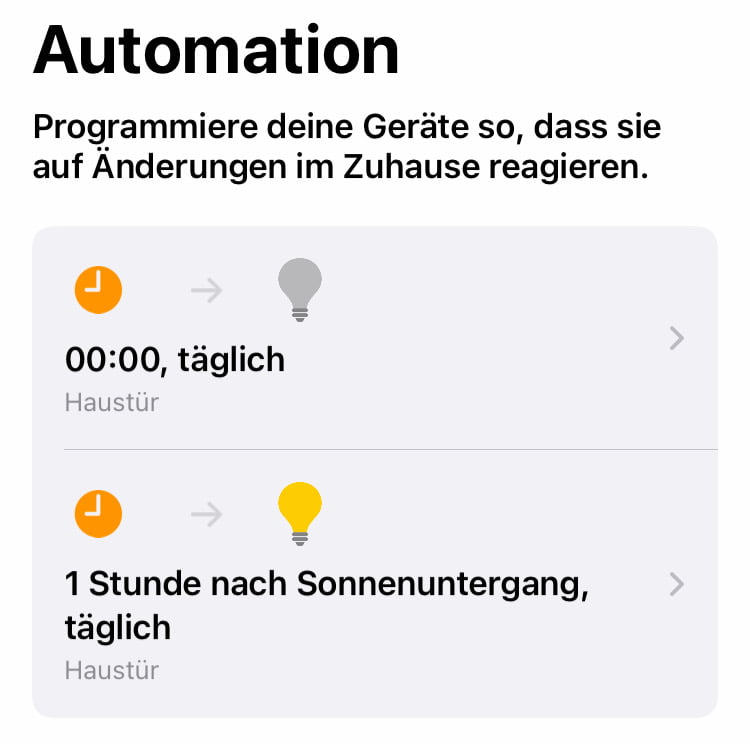
But from the beginning. You first create an automation that turns on the lamp. For example, you can use the position of the sun as the trigger time (or 30 minutes later – just tap on the small i). You then select the lamp and, for example, the desired brightness. After that, there is the option “Deactivate” – and here you may be confused at first.

You can define a switch-off time, but only up to four hours after activation. That is not long enough for some usage scenarios. So leave the setting at “Never”, even if it sounds wrong at first.

So after we turn on the lamp at a certain time, we have to turn it off again with a newly created second automation. So create this one, select the desired shutdown time and the status of the corresponding lamp (this time off, of course).
Now you have two timed automations accessing the same device. It is important that you always have to create two: one for switching on, one for switching off. Exceptions are actions that last a maximum of four hours.