If you have a NAS, a Network Attached Storage, from Synology or Qnap at home, you will want to access the data via the Internet at some point. A VPN is the safest way to do this. Since both manufacturers provide an OpenVPN server with their systems, we would like to use it. In this article you can learn how to set up this secure way of access for your Synology or Qnap NAS.
Preparation: Open a router port and start OpenVPN server
First, you should open a port on your router that will pass requests through to your NAS’s OpenVPN server. The default port for the OpenVPN used here by Qnap and Synology is 1194. However, you can also use an unused port from the upper range, for example 49999.
How to open a port on a FritzBox is described here. This is quite easy. With other routers the function will be called and structured similarly.
Furthermore you have to enable the OpenVPN server on the Synology or Qnap NAS for IPv4 or IPv6. This is also done with a few mouse clicks. Please note that Qnap currently does not support IPv6 for an OpenVPN connection. If you want to establish an IPv6 connection, make sure that your router has the IPv6 function enabled and distributes addresses to connected devices via prefix delegation.
- Instructions: Turn on Synology OpenVPN Server
- Instructions: Turn on Qnap OpenVPN Server
- Instructions: enable IPv6 on FritzBox router with prefix delegation
So now your NAS has an OpenVPN server turned on, expecting connections through your router’s open port. In addition, you have turned on your router’s IPv6 feature if needed. Now let’s take care of what happens on your Mac and how to reach the NAS on the go in the first place.
Viscosity: Logging on to IPv6 and IPv4 OpenVPN servers
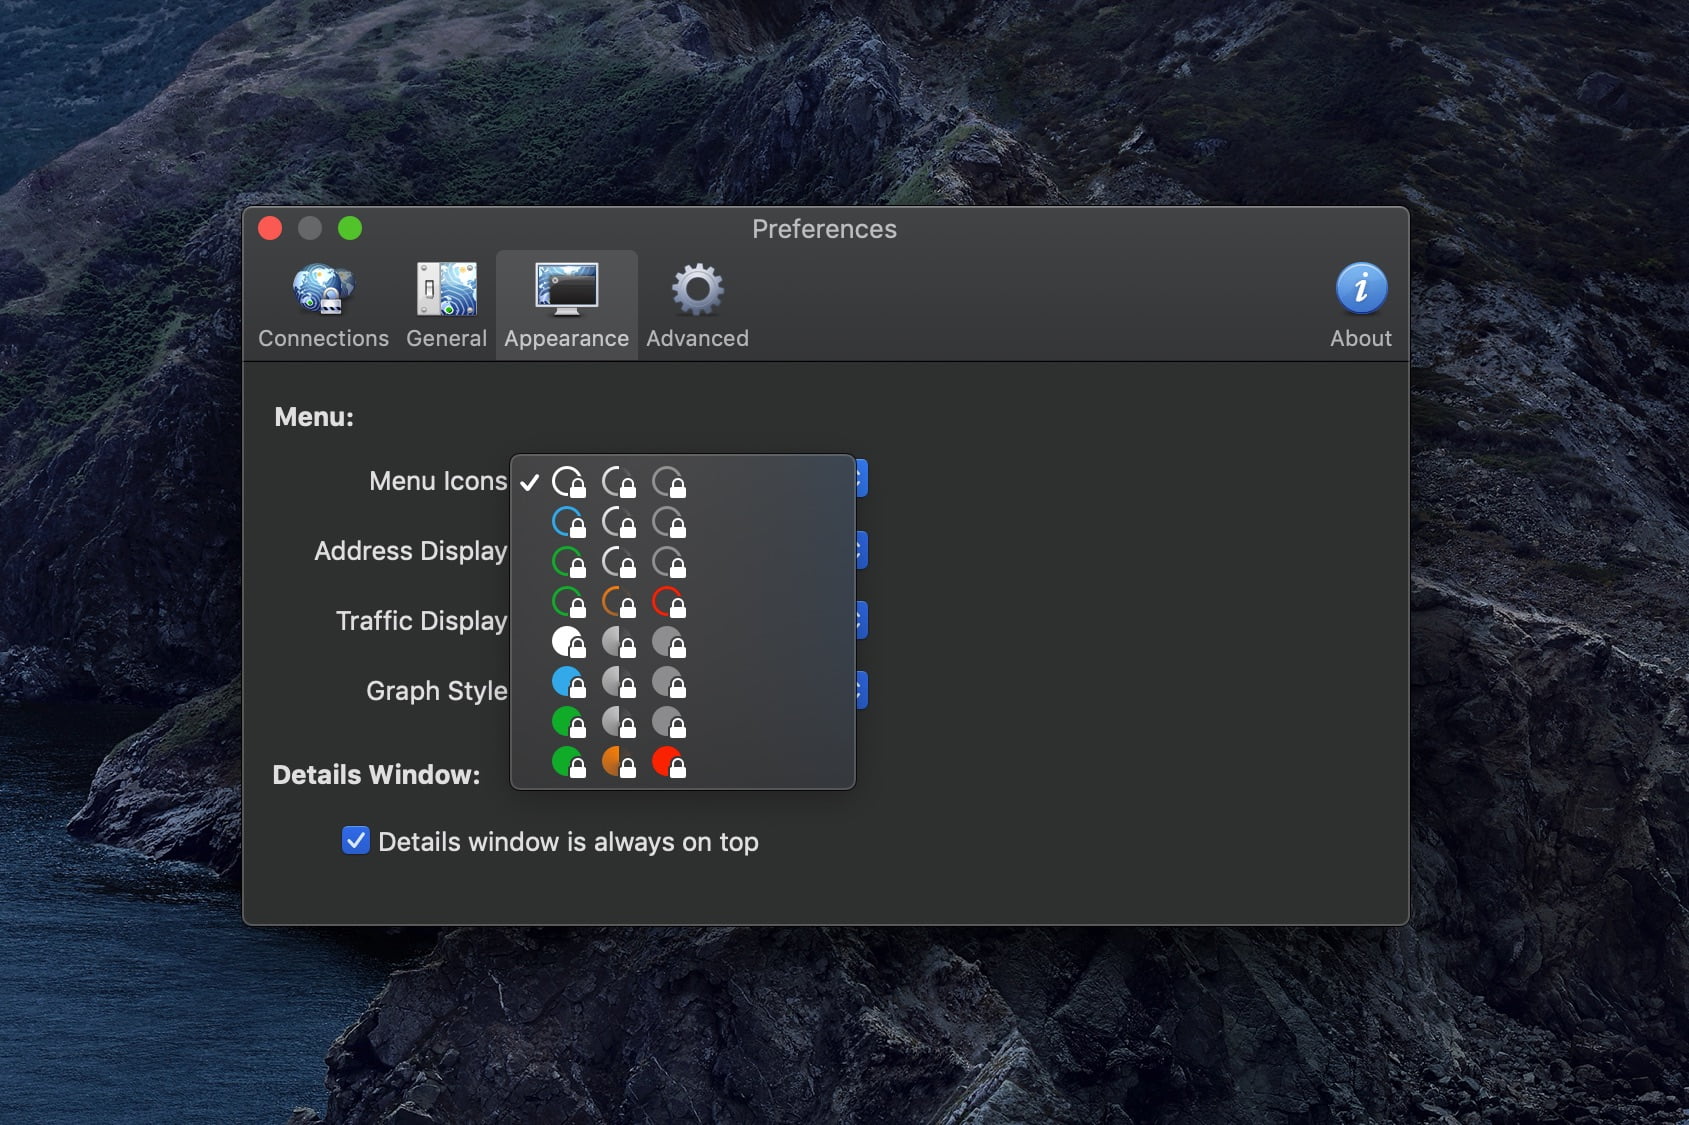
Since macOS doesn’t come with a built-in client for OpenVPN, we opt for Viscosity as a client. It costs a fair $14 for single users and the support via mail or forum is excellent. So install Viscosity for now, you can even try it for free for the first four weeks. The app saves us a lot of fumbling around in configuration files and on the command line. If you need a VPN client that supports protocols like IPSec or L2TP you can also use “Shimo“, but then you have to spend around $50. For the pure use of OpenVPN, however, we use the excellent Viscosity here.
OpenVPN Split Tunneling to Synology and Qnap NAS
What we want to achieve is the following configuration: not only at home but also from the road we would like the links created in the Finder for NAS folders should be accessible under the same address – after all, we have already created the links for the network drives. At the same time, only the traffic that is supposed to end up on the NAS should be routed home through the VPN. The gigabyte-by-gigabyte streaming of Netflix should be handled quite normally via the current available network.
In order for this to be possible, we need to use split tunneling. This means nothing more than splitting the traffic coming from your Mac: once to the NAS at home and once to the Internet normally.

The articles linked above on how to turn on the OpenVPN server ends with downloading the configuration file or certificate. We now import them into Viscosity. To do this, simply go to the small plus at the bottom left and import the file. Now you have a first connection on the overview page of Viscosity. Highlight it and go to “Edit” at the bottom right.

Now read on in the desired section (Synology IPv4/IPv6 or Qnap IPv4):
Synology NAS: Set up OpenVPN server for IPv4.
In the “General” tab, you can now simply change the name of the connection. Important is now the first setting, namely the address of the Remote Server. Here you enter the DDNS address of your NAS.

On your Synology you can find this setting in Control Panel > External Access > DDNS. Use a DDNS service of your choice. We simply chose the one from Synology (this function is not identical to QuickConnect but makes the NAS only accessible via the IP. Logging in is not possible with this).

If you already have a DDNS for your router, it is sufficient (in combination with the corresponding port; only for IPv4) and you do not need to make this setting on Synology.
As a protocol simply choose UDP or UDP v4.
Settings for Split tunneling
Now we enter a route that leads to your NAS at home. This is sort of introducing the actual split tunneling: we tell the program that all requests to this one local address should be routed to home via VPN and mapped there.
Under Network you add a new route under “Routing”. The destination is the local address of your NAS, for example 192.168.178.127 or 192.168.1.3. The IP version remains “IPv4”, as gateway you select “VPN Gateway”.

Next, under DNS Settings add “10.8.0.1” as the server – this is the NAS in the VPN (your computer will then get 10.8.0.2 in the VPN, for example), under Domains enter “synology.me” or the DDNS service you have selected.

With these two settings we now achieve that Viscosity knows which address should run over the VPN (the one to the NAS) and what not (everything else). In addition, the DNS resolution of the VPN should be taken over by Synology (as opposed to the traffic that normally ends up on the Internet). The settings All Traffic and DNS Settings: Mode remain on automatic.
Synology NAS: Set up OpenVPN server for IPv6.
In the tab “General” you can now simply change the name of the connection. Important is now the first setting, namely the address of the Remote Server. Here you enter the DDNS address of your NAS.

It is important for an IPv6 connection that it is absolutely the Synology on which the DDNS service is running. Even if your router is already registered with a DDNS service, it won’t do us any good here. It needs to be configured on the Synology.
On Synology you can find this setting in Control Panel > External Access > DDNS. Use a DDNS service of your choice. We simply chose the one from Synology (this function is not identical to QuickConnect but makes the NAS only accessible via the IP. Logging in is not possible).
Simply select UDP or UDP v6 as the protocol in Viscosity.
The second important setting on Synology is done in the tab “System Settings > Network > Network Interface”. There mark “LAN” and then go to “Edit”. In the IPv6 tab, under IPv6 Setup, select the “DHCPv6-PD” setting. PD stands for Prefix Delegation and ensures that new IPv6 address prefixes assigned by the provider are forwarded to all devices in the network. Also set a check mark at “Default Gateway”.

Now we enter another route that leads to your NAS at home. This is, so to speak, the introduction of the actual split tunneling: we tell the program that all requests to this one local address should be routed to home via VPN and assigned there.
Since the split tunneling setting is done the same way as with the IPv4 variant we simply refer to above instructions here.
Qnap NAS: Set up OpenVPN server for IPv4
In the Viscosity tab “General” you can now simply change the name of the connection. Important is now the first setting, namely the address of the Remote Server. Here you enter the DDNS address of your Qnap NAS.
You can find this setting on your Qnap in Control Panel > Network > DDNS Service. There you have several service providers to choose from. Activate the function by setting the check mark. With this function you do not need to use Qnap’s cloud function.
If you already have a DDNS for your router, this is also sufficient (in conjunction with the appropriate port; only for IPv4) and you do not need to make this setting on the Qnap.
As protocol you have to choose UDP or UDP v4.

Setting up split tunneling is done the same as with the IPv4 variant for Synology. Therefore, we simply refer to the above instructions.
Qnap NAS: Set up OpenVPN server for IPv6
Currently, Qnap’s OpenVPN server does not yet offer IPv6 support. However, we will keep you updated.
NAS accessible on the road via OpenVPN
.
Now the Synology as well as the Qnap are accessible on the road via OpenVPN, the Synology even via IPv6 addresses, so on access is possible even via fiber or cable connections that no longer offer IPv4 addresses.

Once a VPN connection is established, a NAS can be reached via multiple addresses: Once over the one assigned by the VPN (usually 10.8.x.x), then over the one of the tapped network (usually 192.168.1.x, so as if you would be in the home network) and then with IPv6 addresses if you chose the modern variant. But since we will probably use the IPv4 addresses created in the Finder, we only have to deal with IPv6 for the time being to establish a connection over the internet. The VPN can stay on IPv4.
If it doesn’t work out go through this small list again:
Summary of troubleshooting steps:
- Port sharing in the router
- Possibly turn on the IPv6 function in the router
- Turning on the OpenVPN server
- Possibly turn on the IPv6 function of the OpenVPN server
- Possibly configure the IPv6 network settings of the NAS properly
- DNS reachability of the NAS
- correct settings in Viscosity for split tunneling
When using the Synology OpenVPN server under IPv6, it should also be mentioned that it grumbles after a few days if there have been given out new prefixes for the IPv6 addresses from your provider.
Synology OpenVPN with old IPv6 prefixes
These are not automatically updated (Synology knows of course about this circumstance and is working on it). However, it was now the case that despite this error message, the OpenVPN connection was still established without errors. Since the address of the Synology itself was updated cleanly (and thus the DDNS accessibility is guaranteed), we at least get to the Synology and are forwarded to the OpenVPN server there. The fact that there are now wrong prefixes (outdated) seems to be a problem only if you also want to use IPv6 addresses in the VPN. If you only want to set up an IPv4 VPN via an IPv6 network or only get as far as the Synology anyway, this circumstance is not a restriction according to our experience. The Viscosity client creates appropriate routes during the connection setup itself (you can follow it yourself under Details).
Synology: The selected prefix is no longer valid, please select a valid prefix
We even received a detailed comment from a developer of Viscosity, which you can view here. So if you have to run a Synology on a connection that only has an IPv6 address and you only need to get to the Synology (other network experiments excluded), you should be lucky that it works permanently. In this situation, we would be very happy if you would share your experiences with us!