Every third party SSD in you older Mac that you upgraded on your own is not TRIM-supported immediately. Apple allows it, but you have to activate it manually. Here is how.

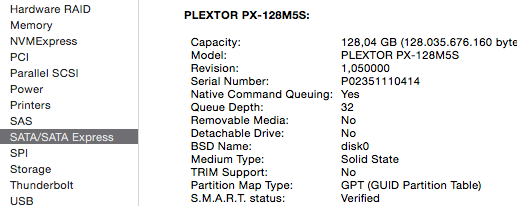
Since OS X 10.10.4 (now known as macOS) it is possible active TRIM officially via the Terminal. This is only necessary if you changed you SSD with a non Apple one. If you have a Mac with a third party storage device, you can check if TRIM is enabled already – for example if you bought a used Mac. You find that information in the System Profiler > SATA/SATA Express.
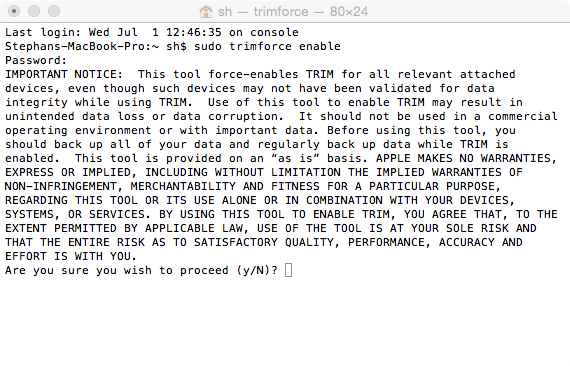
If TRIM support is not enabled, you will find a simple “No”. To change that, go into Utilites > Terminal and type in these three words:
sudo trimforce enable
You have to confirm the warning that there may be data loss. Although that should not happen, we strongly advice you that you either do this step right after the installation of an empty SSD or that you have a Time Machine backup.
The process takes a little while and then your Mac will reboot. If you don’t believe that TRIM is activated now, just check the System Profiler again. You should find a “Yes” now in the line TRIM Support.

Now the operating system and the SSD work together to keep the speed up and allow for an effictive use of the memory chips.