DIY: Built your own Qi charger and multiple port charger from an old Apple Time Capsule

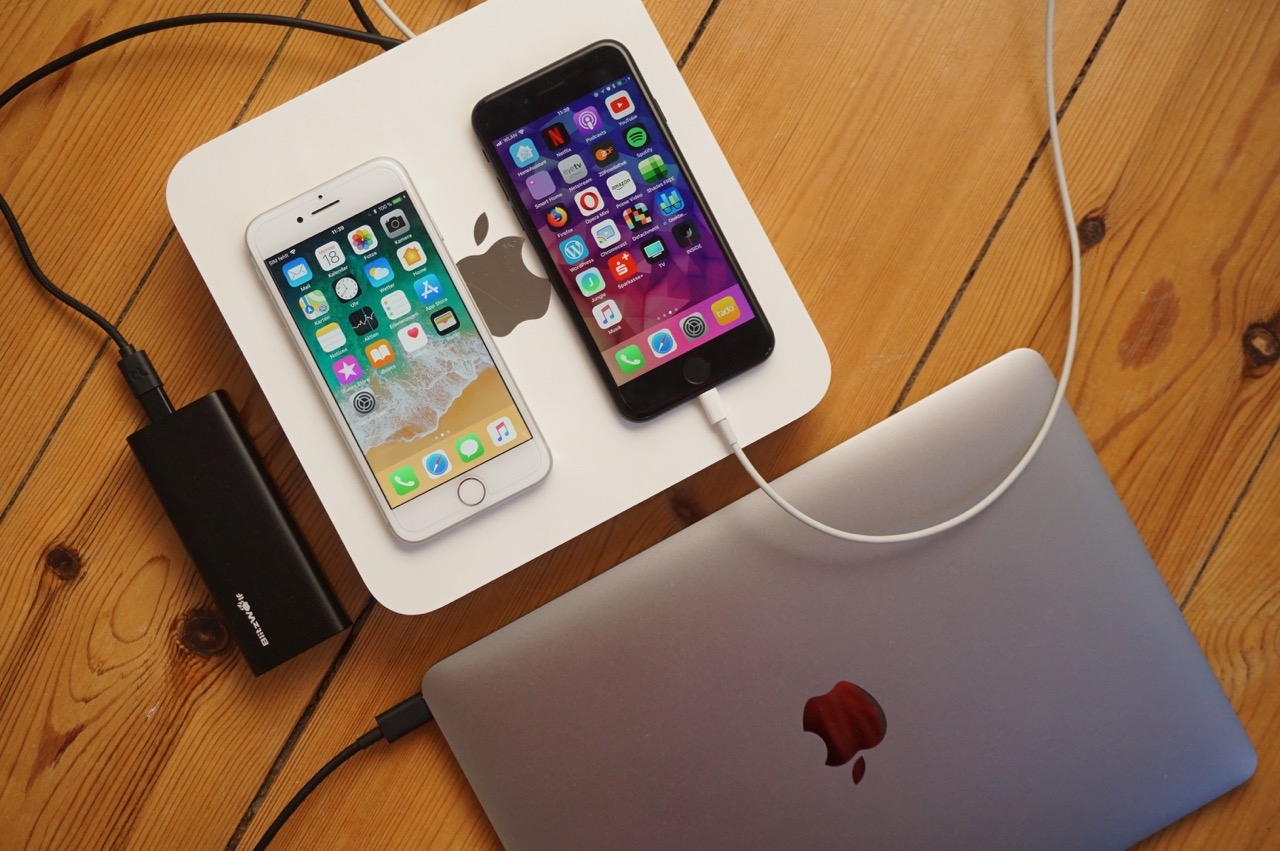
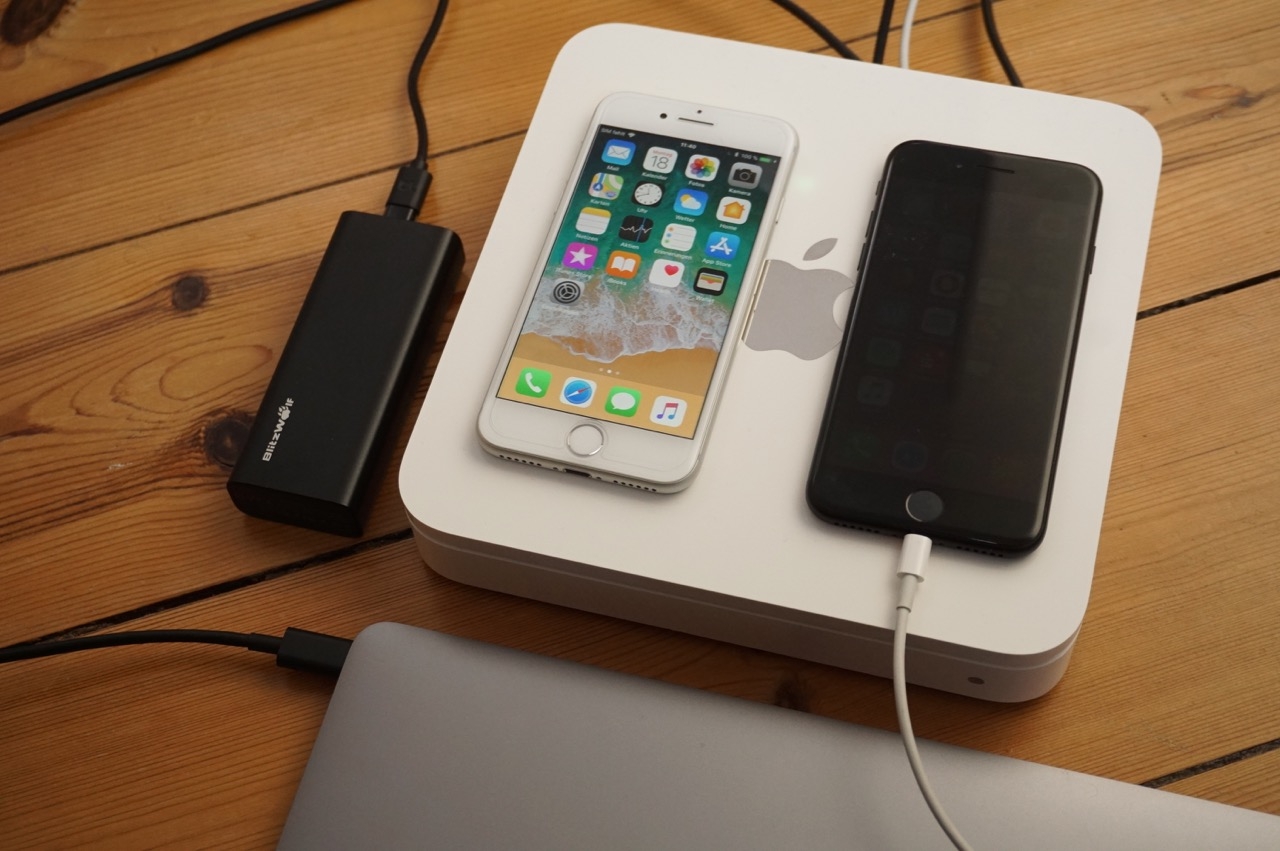
Since the existing Qi wireless chargers for iPhones do work but their design does not really match the Apple charm, today I'll show you the conversion of an old Time Capsule to a Qi charger with USB multiple charging option. In the end, it even loads a 12 "MacBook, an iPad and your battery pack, so the bottom line is that we just put a standard Qi charger and a quad USB charger in an old Time Capsule case, which makes it cheap and easy.
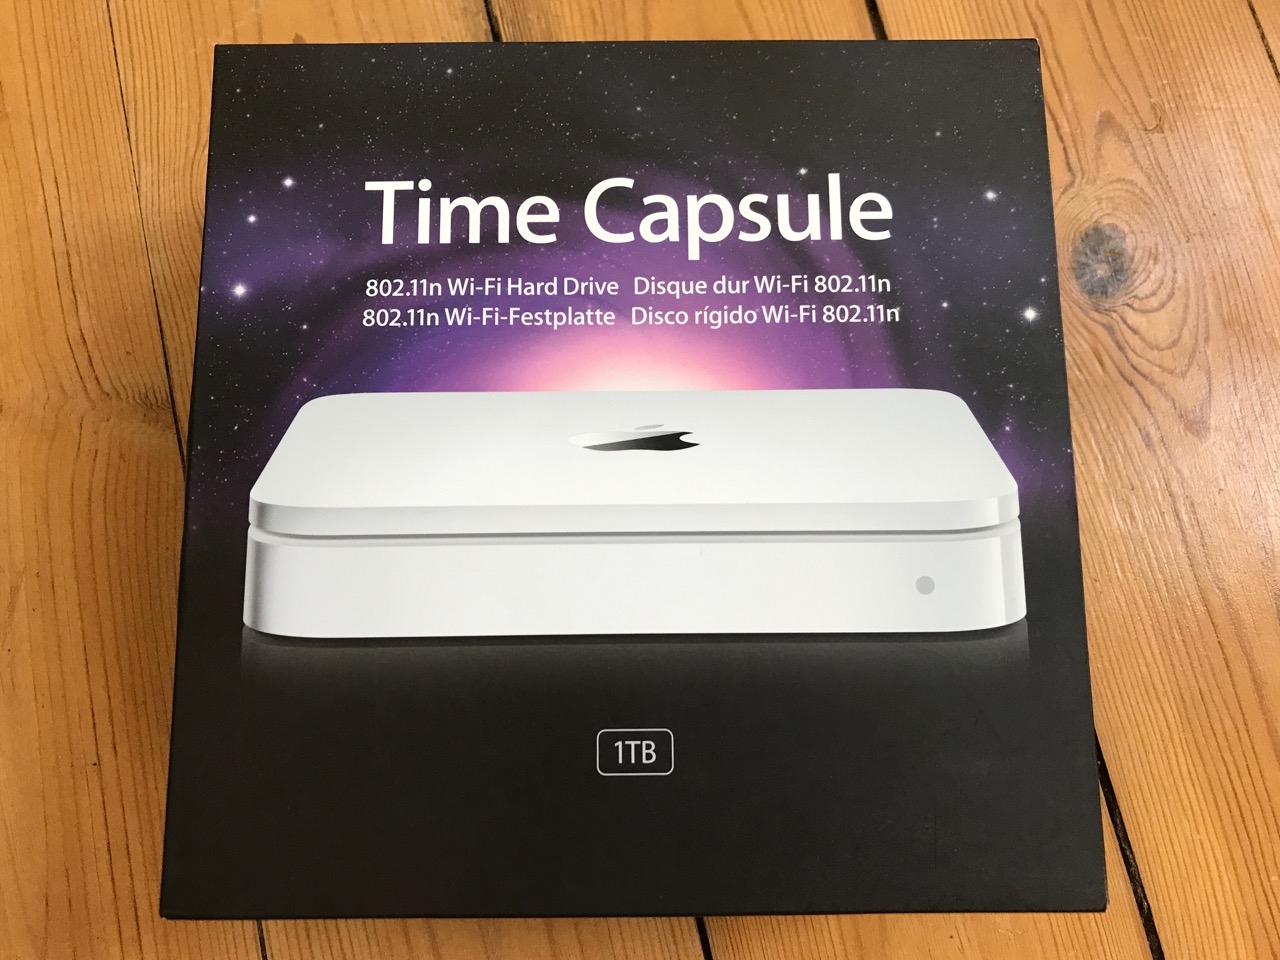
Let's start with the case: I took a second-generation Time Capsule A1302 with the silver Apple logo. This fits perfectly with the reflective logos of the current MacBooks and does not look like ten years old. The case cost me 20 bucks, because the board was broken and the hard drive had already been removed. So do not worry about slaughtering a nice Time Capsule.
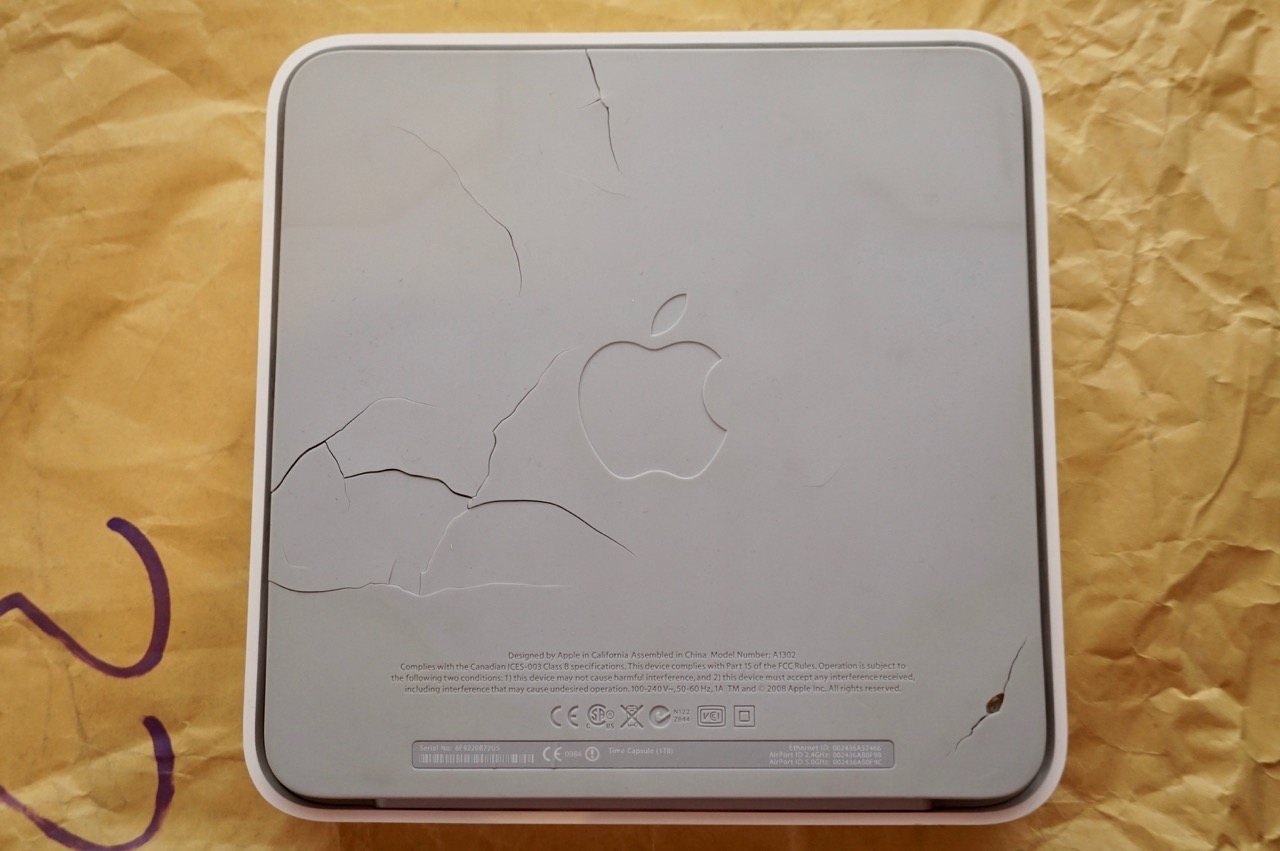

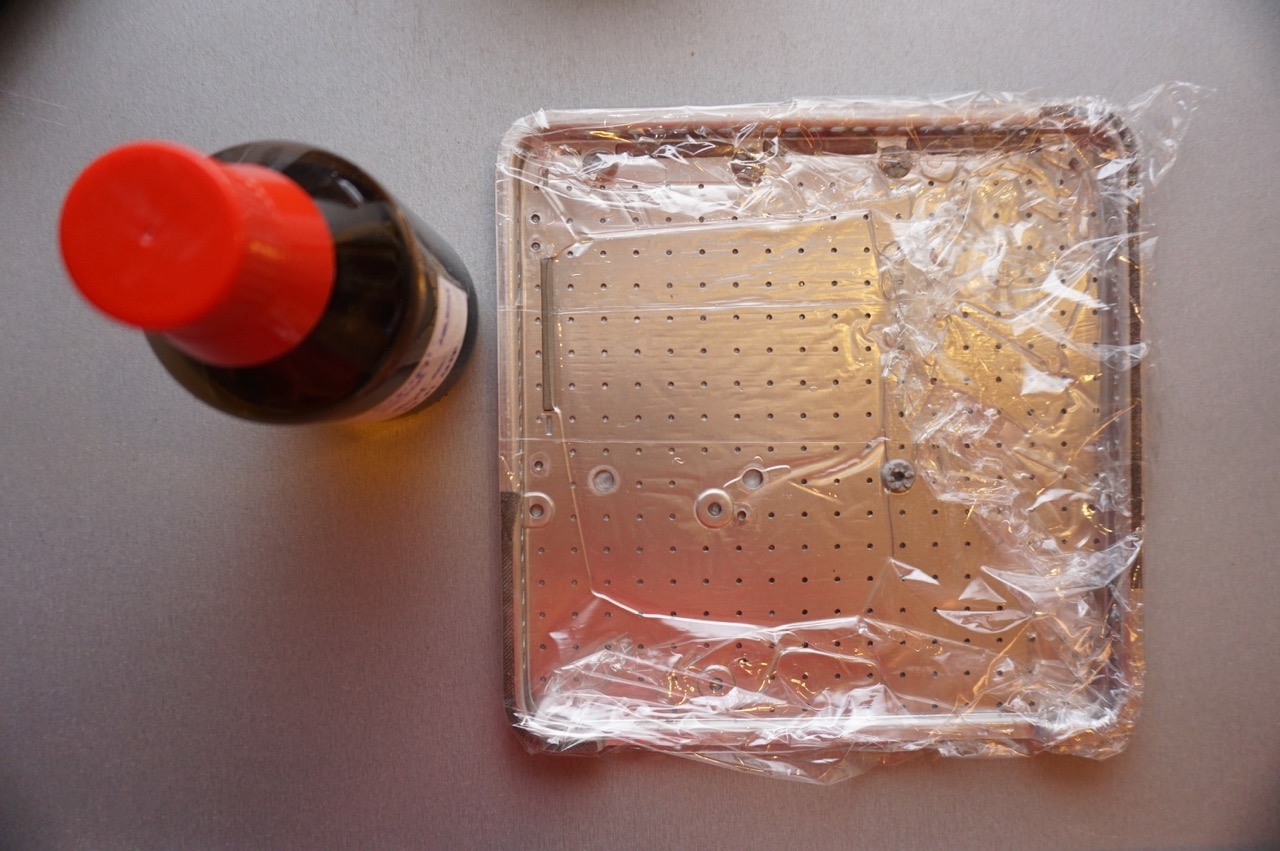
Well, from the bottom you can already see that the case has many years on its back: the rubber base began to disassemble. Since it cannot be saved anyway, just remove it completely. The remaining adhesive residue can be removed by simply placing the entire part in isopropanol (alcohol) and, for example, placing it in a bag or wrapping it in cling film. After ten minutes you will have no trouble removing the leftovers.
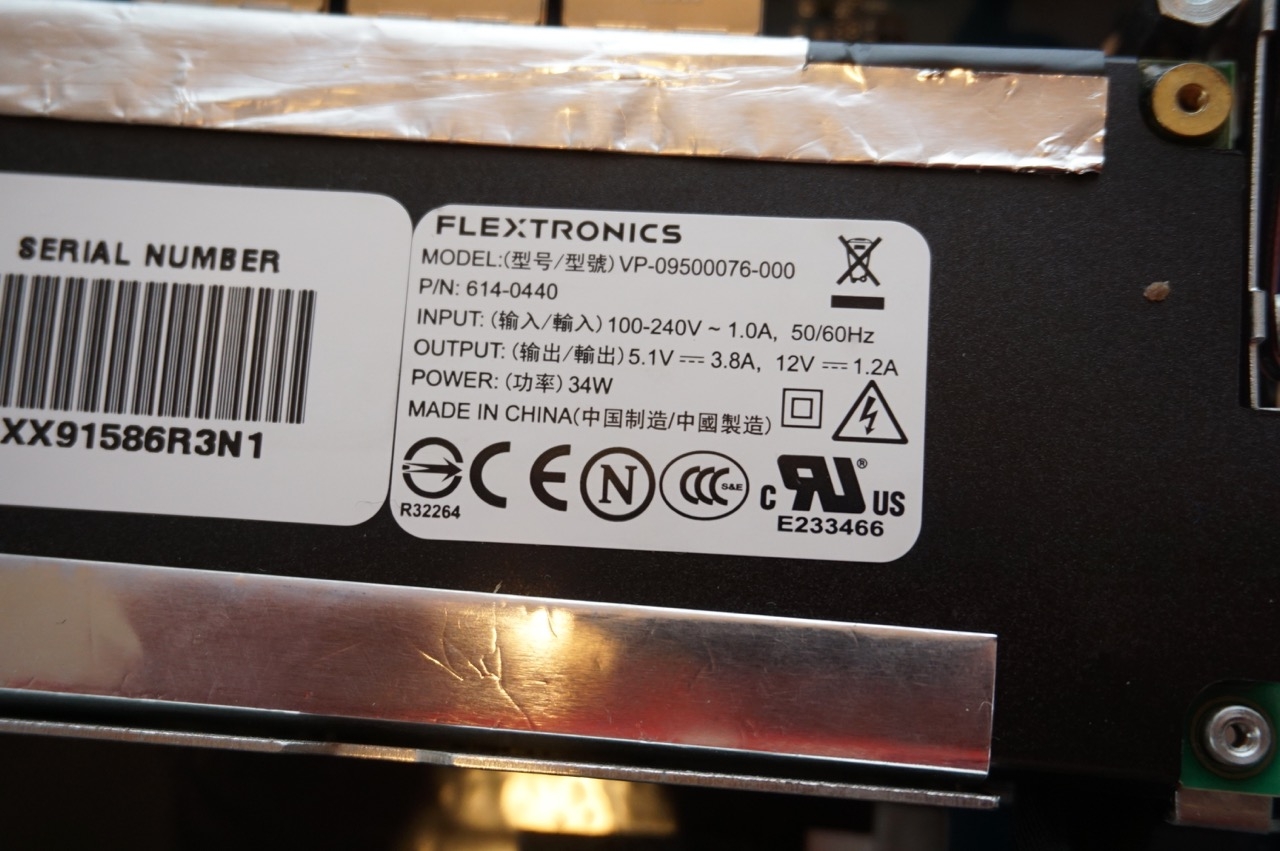
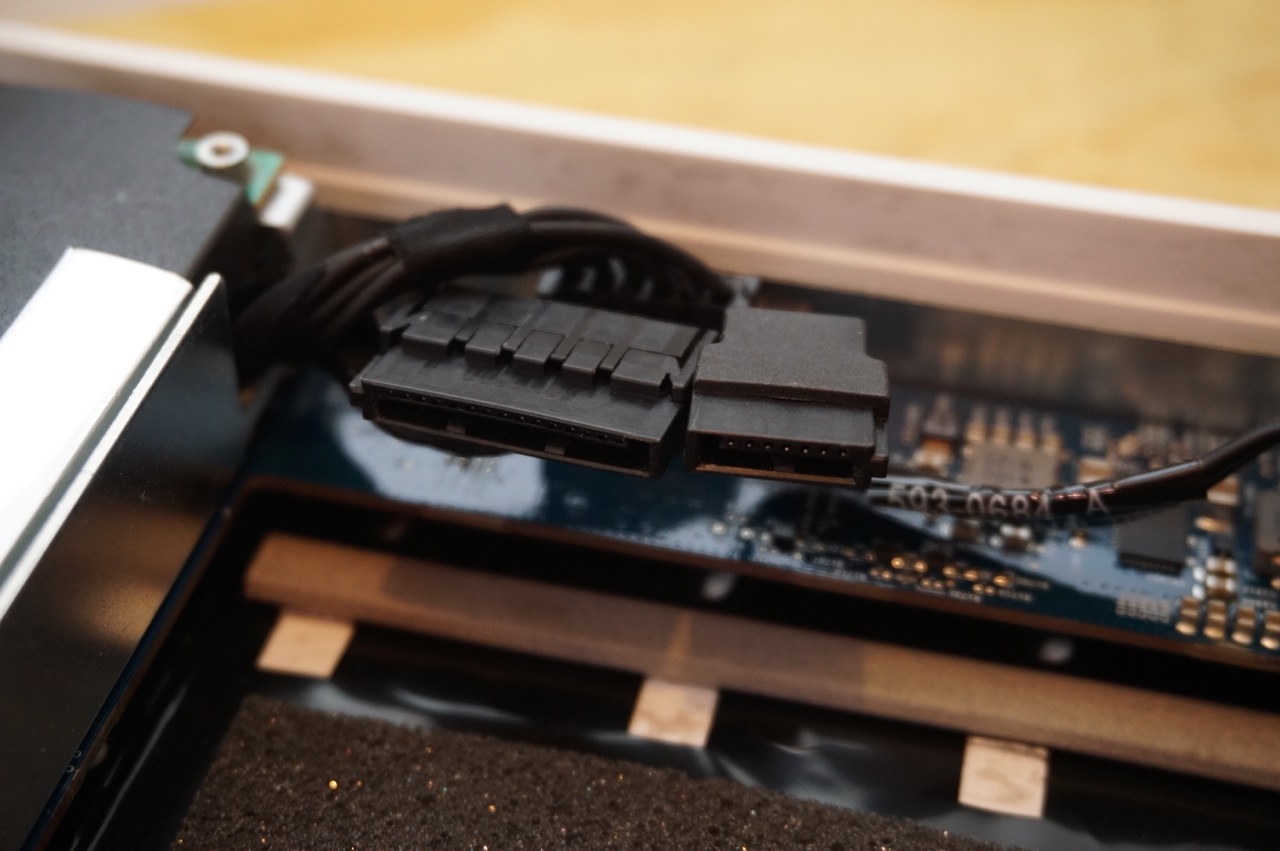
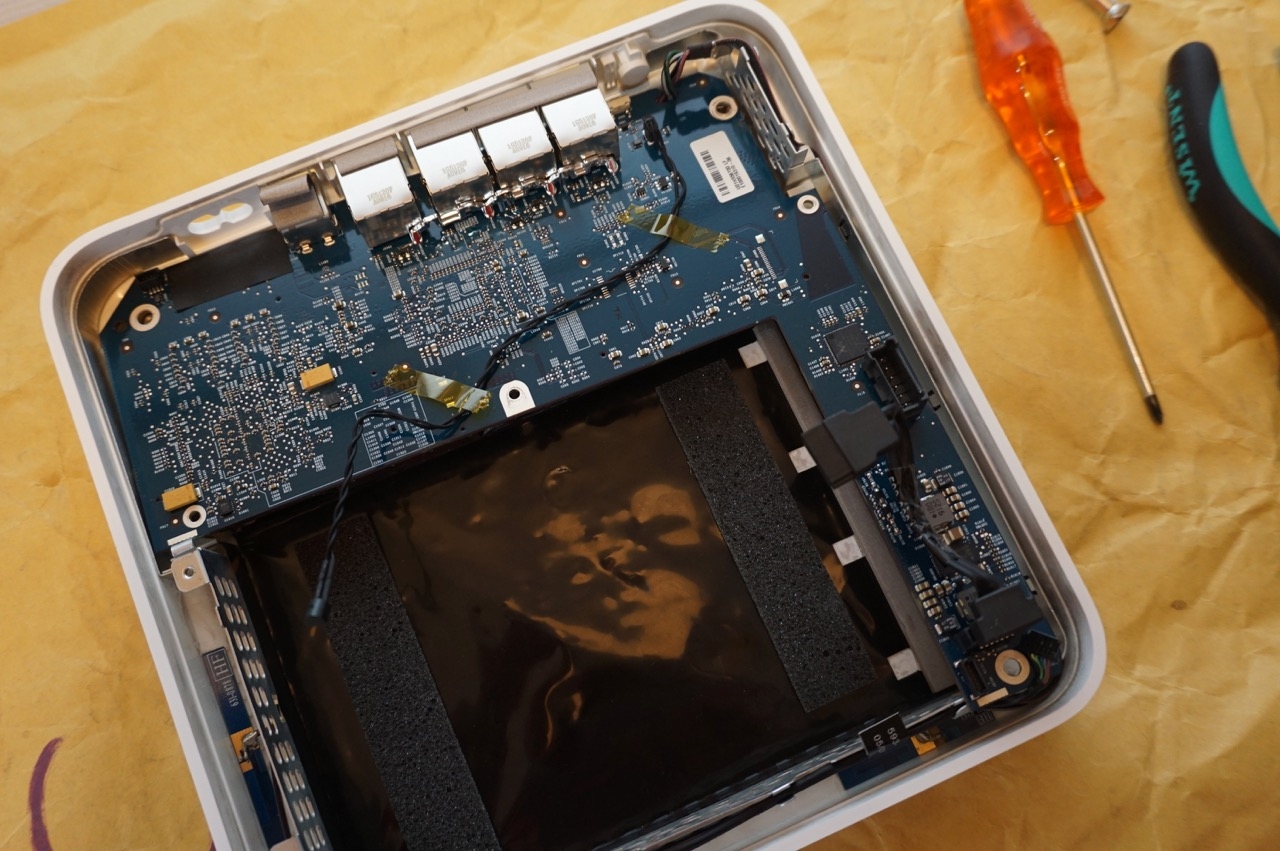
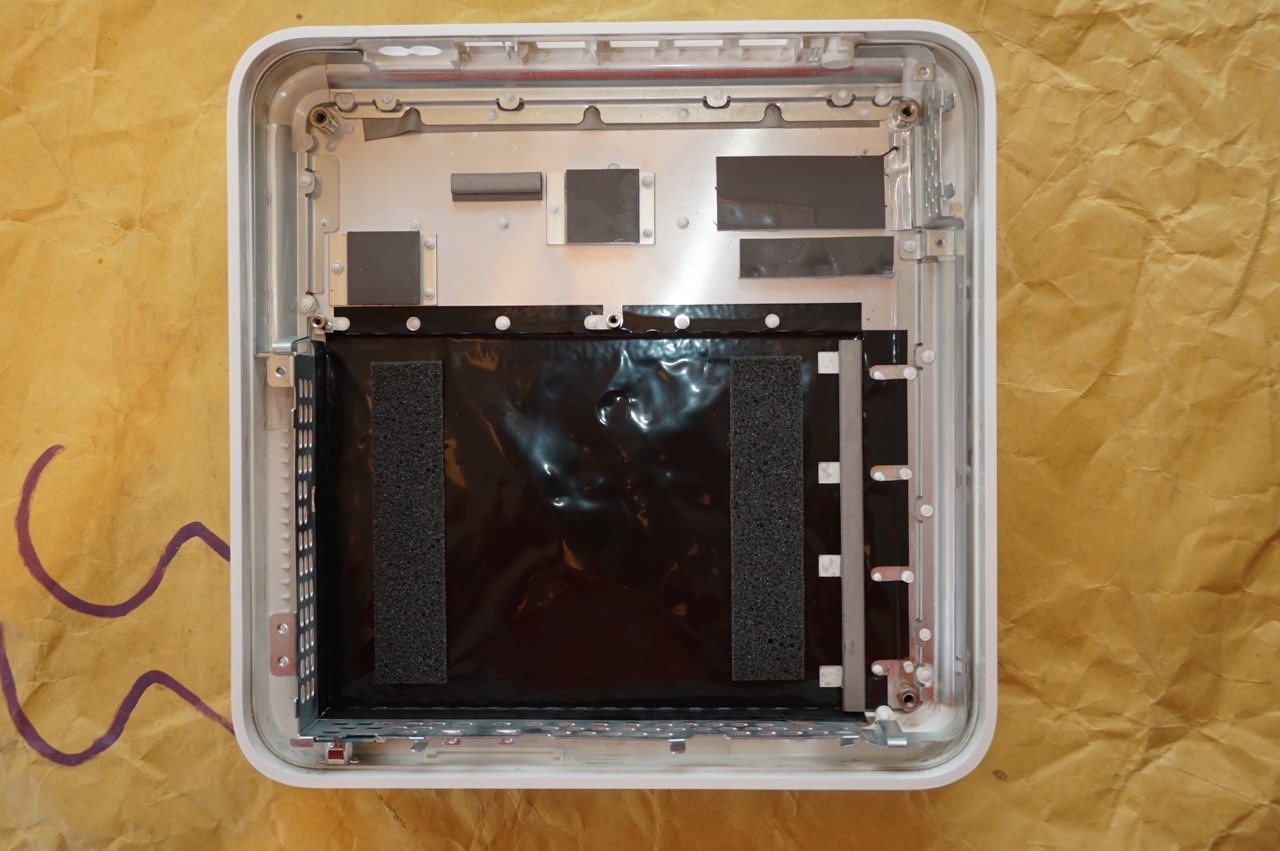
To remove the bottom part, simply remove all visible screws, then it can simply be opened. A small fan is still connected to the board, disconnect the connector and remove the fan from the bottom plate. You will now see the board and the power adapter and the hard drive (which in the picture no longer exists). Removes hard drive and power supply. That the power cable is pulled, should be clear! The power supply puts out a few amps on the 5 volt line and would be sufficient for only the Qi charger, but we chose to another solution. However, if you want to use the power supply, you can of course do that, if you know how to do it. But we play it safe and use another one.
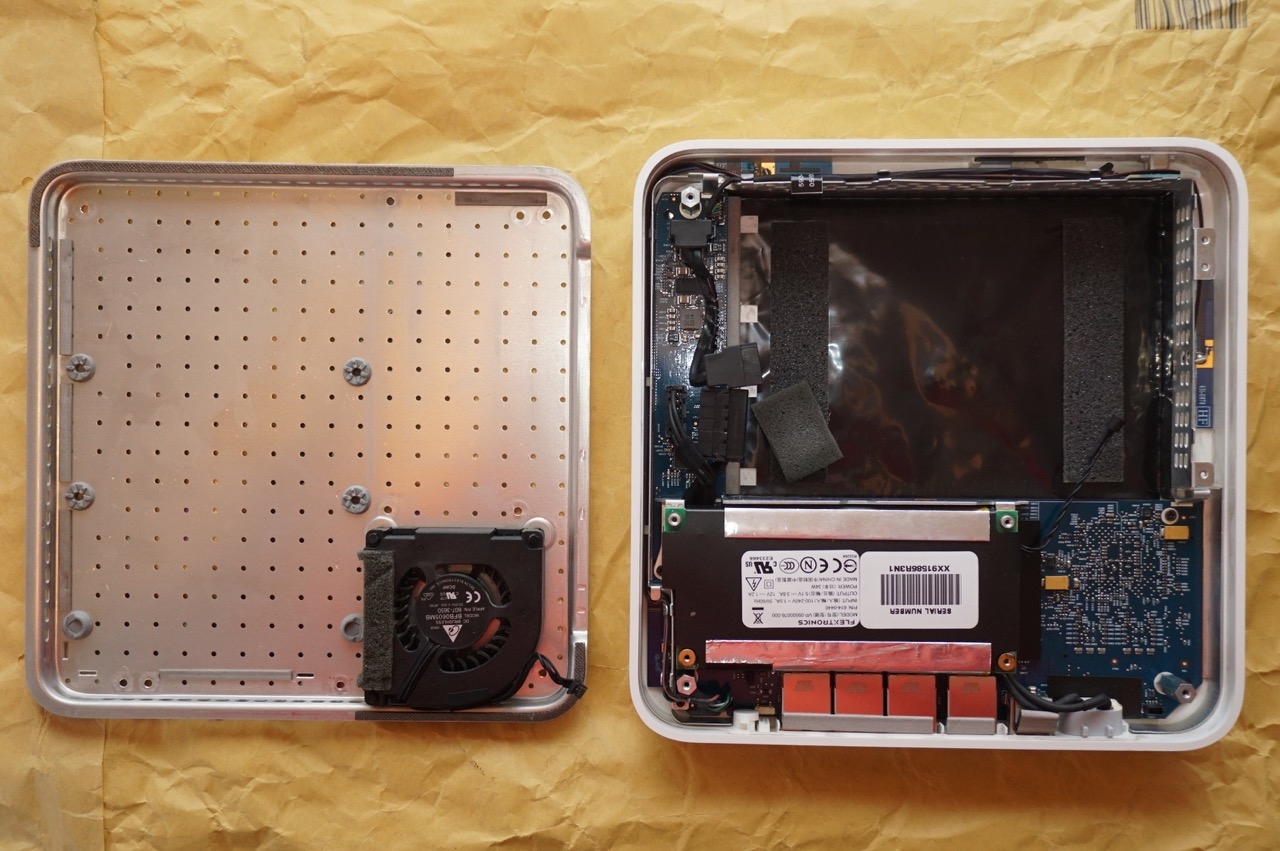
The hard drive is connected to normal SATA plugs, maybe you can use them if you want to go your own way. But first we remove everything and use only the case.
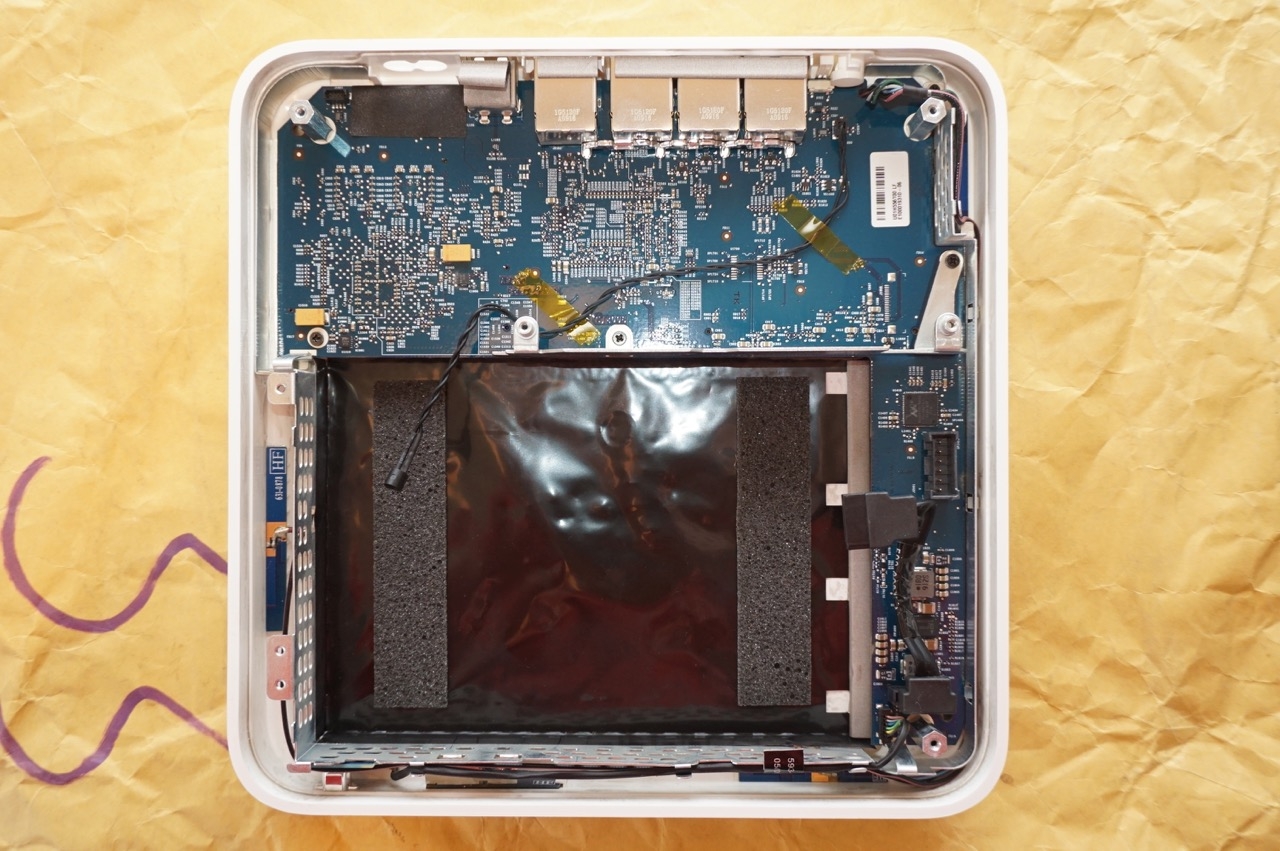
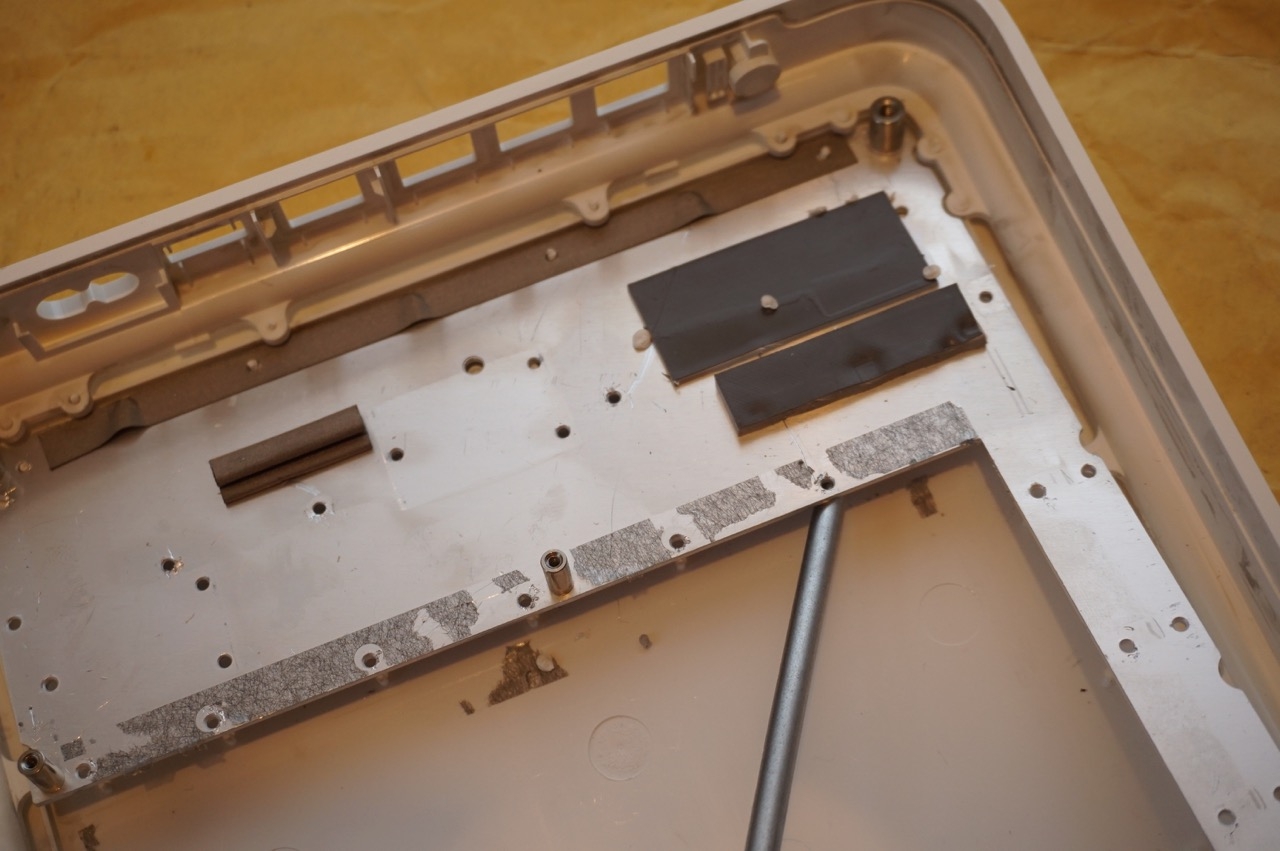
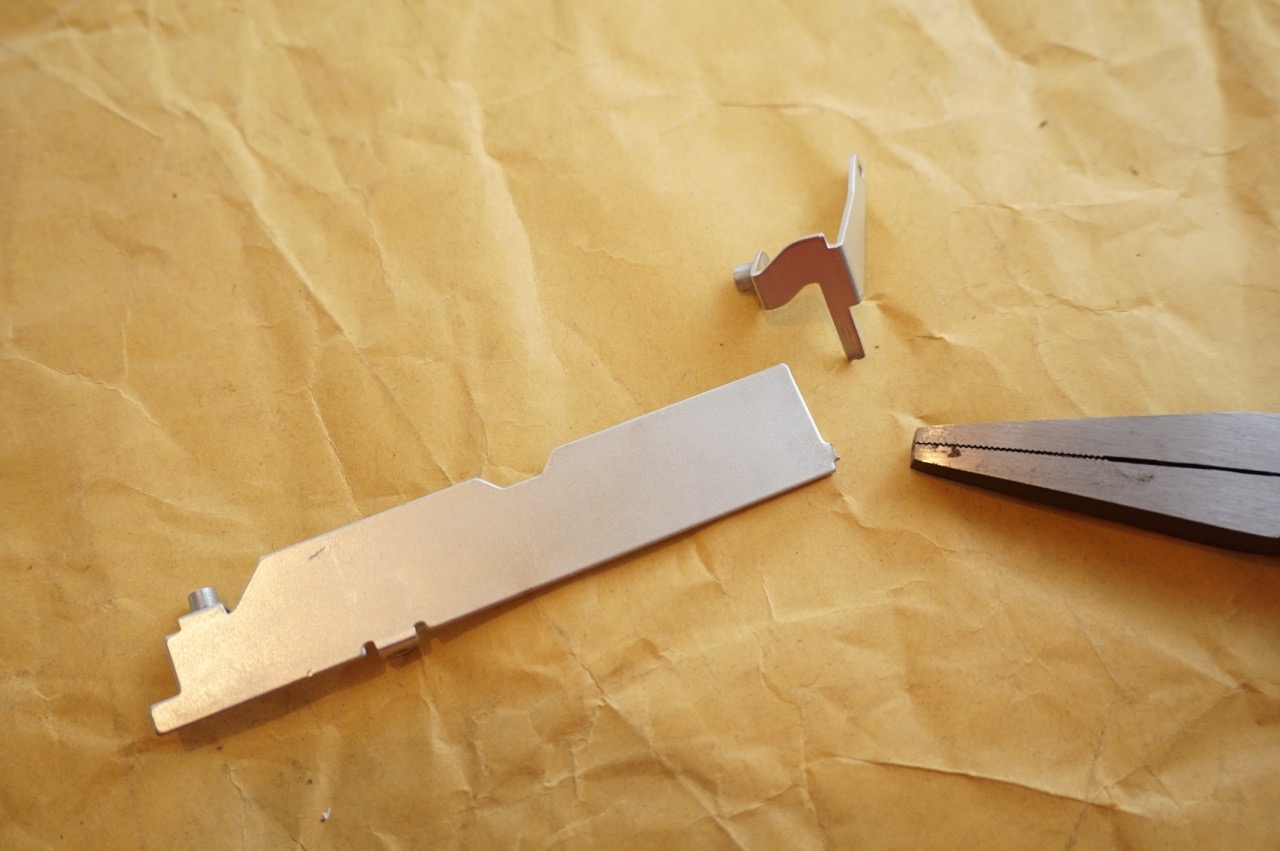
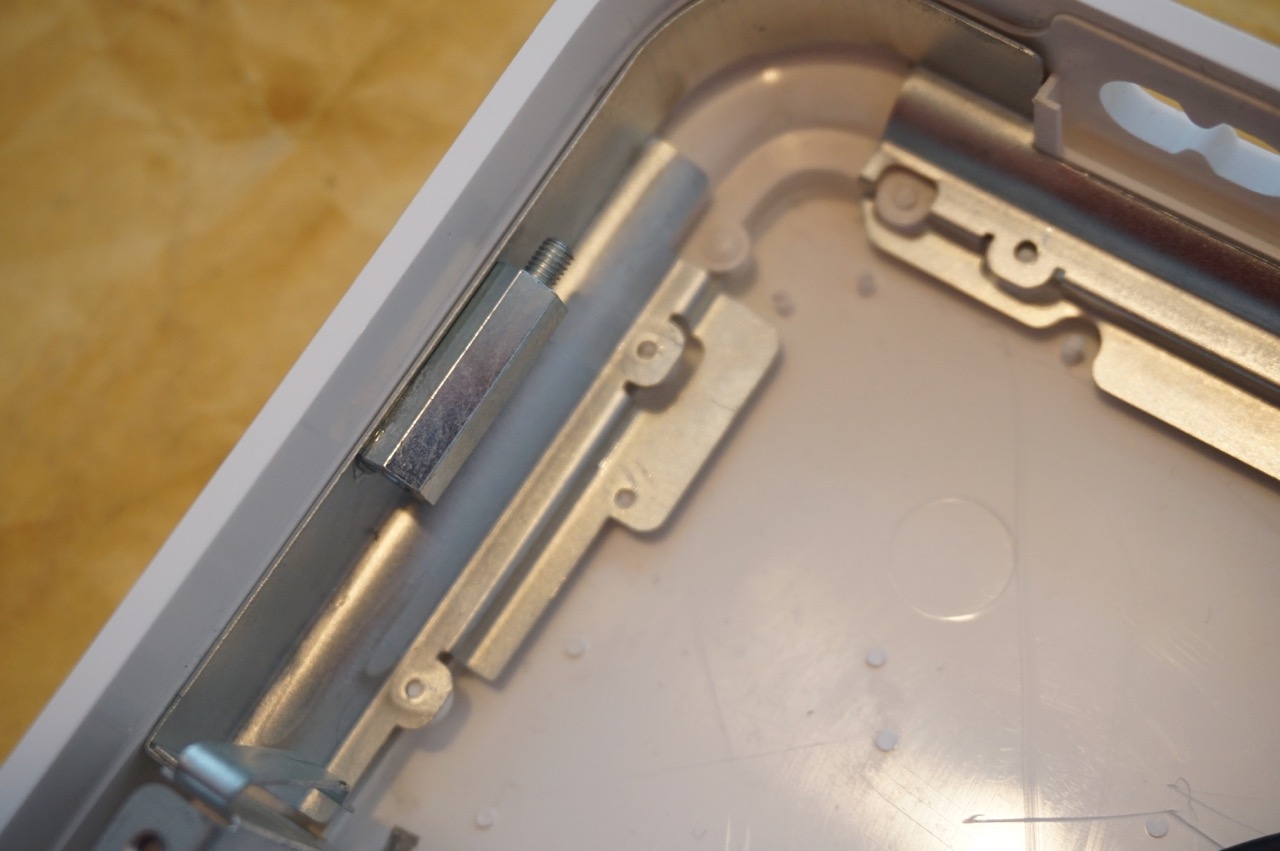
First, we remove the small metal bridge and the studs in the corners of the housing.
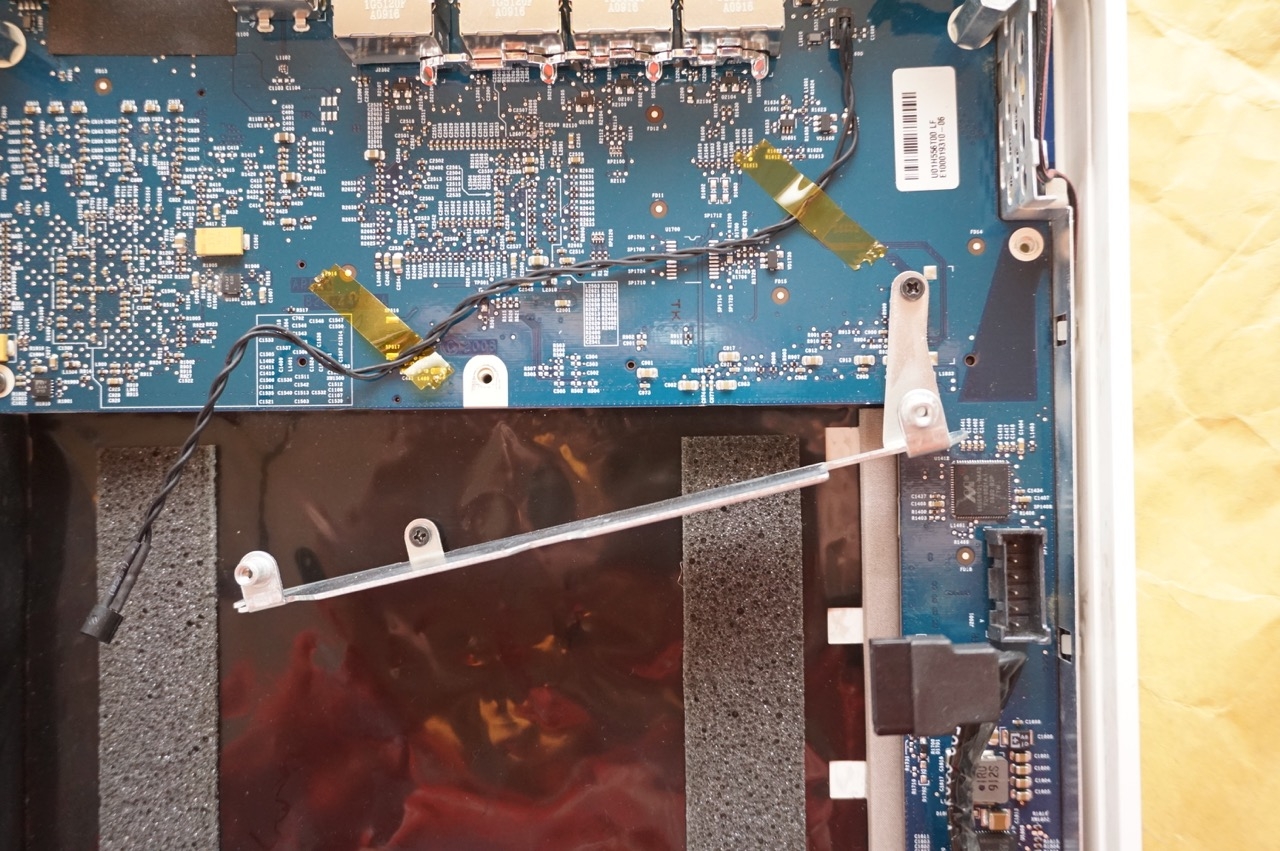
Then the board can be lifted and removed.
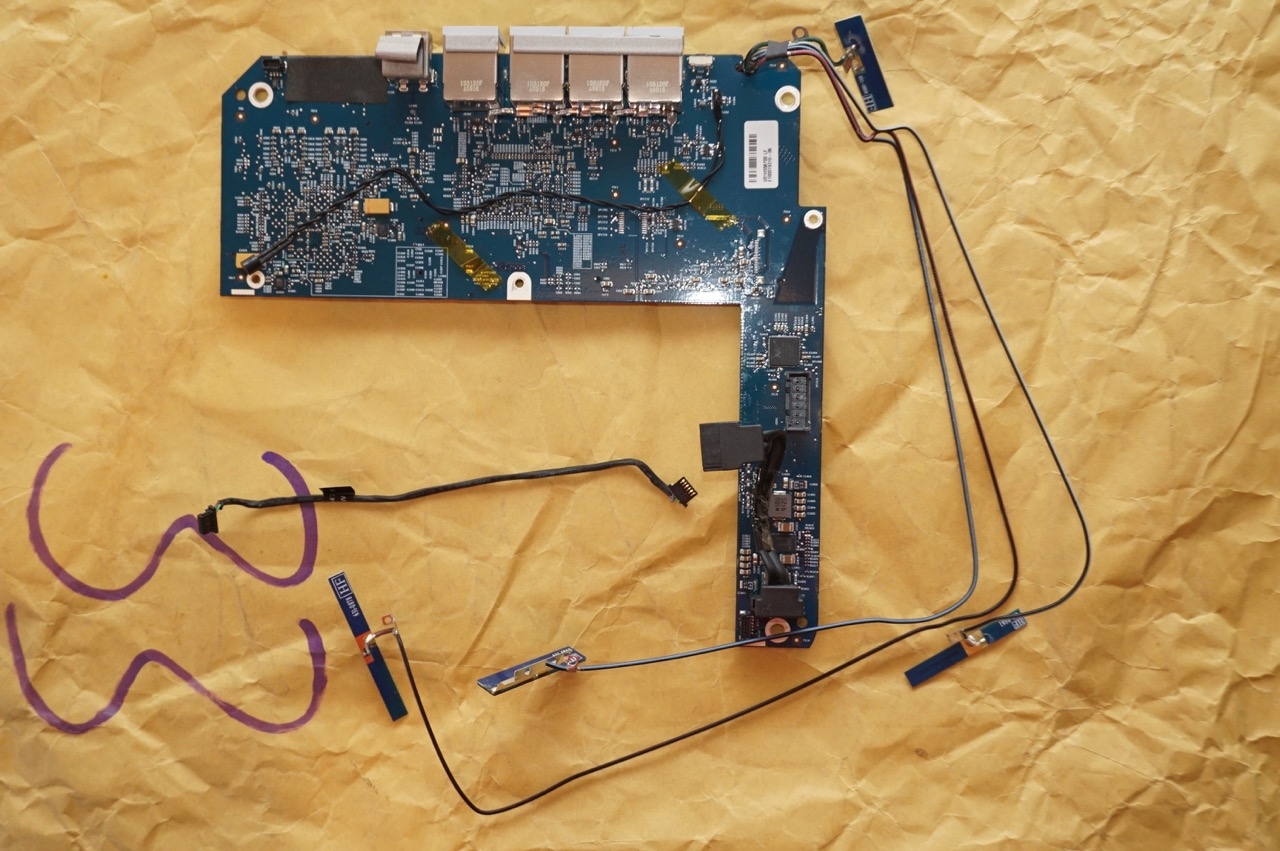
The three WLAN antennas are connected to the board.
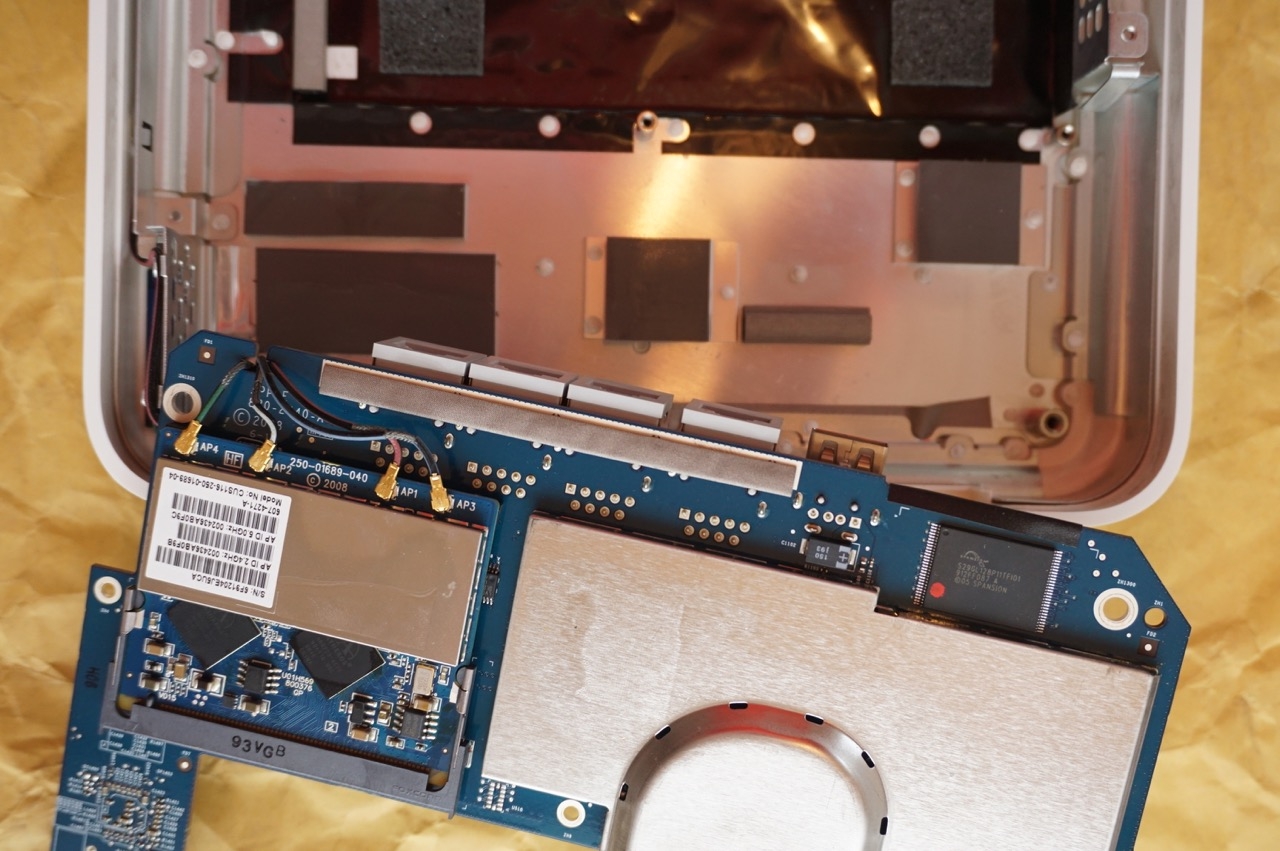
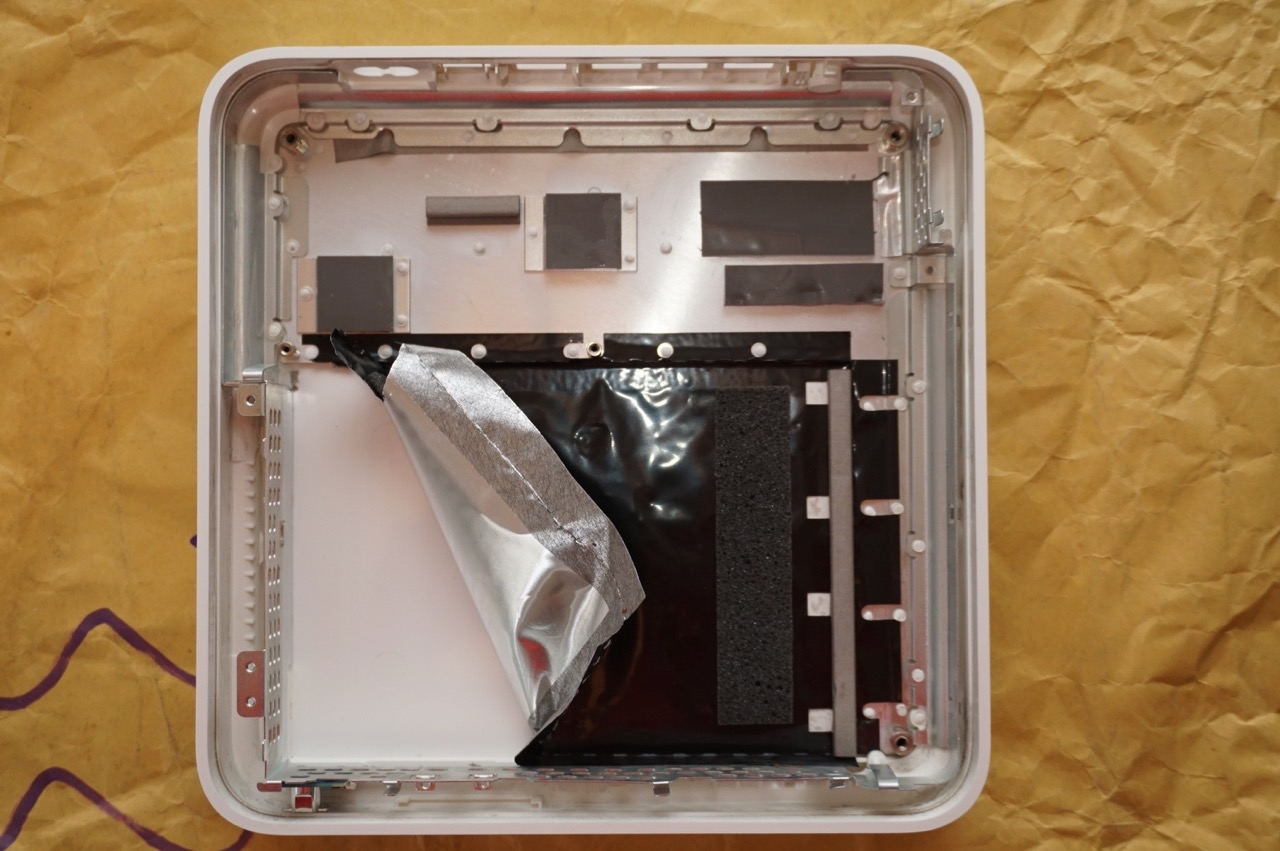
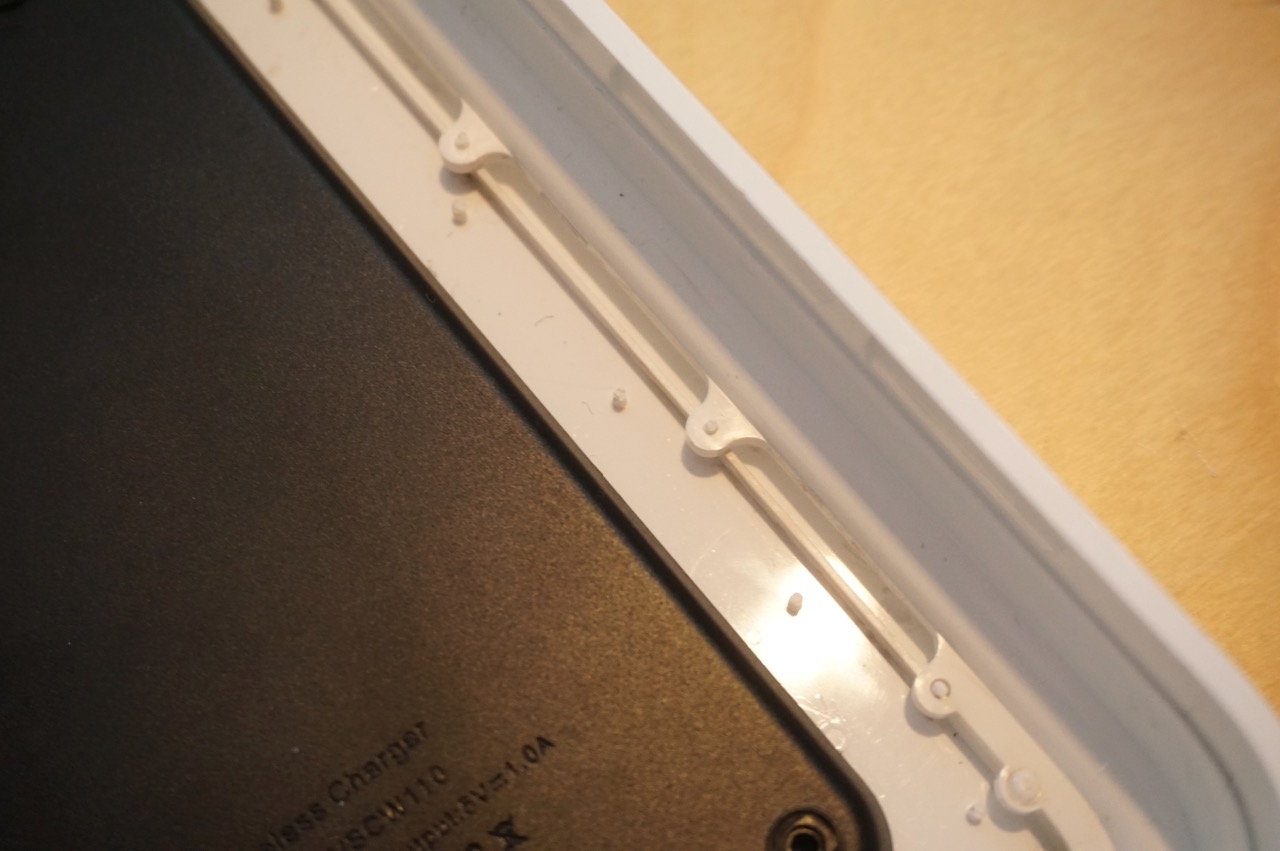
We now have the plastic housing in front of us, that still has a metal reinforcement on the inside. In addition, an aluminum foil is glued in the area of the hard disk. We remove it.
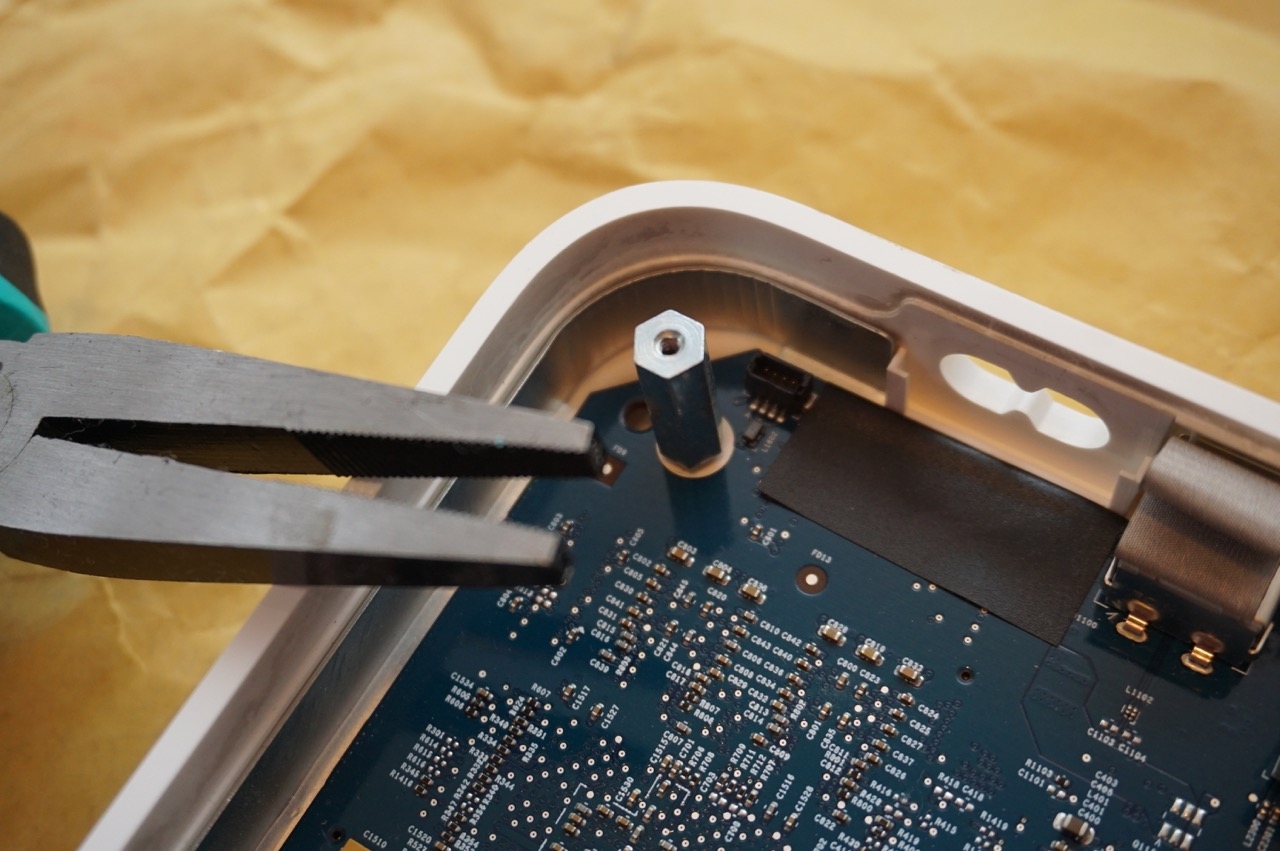
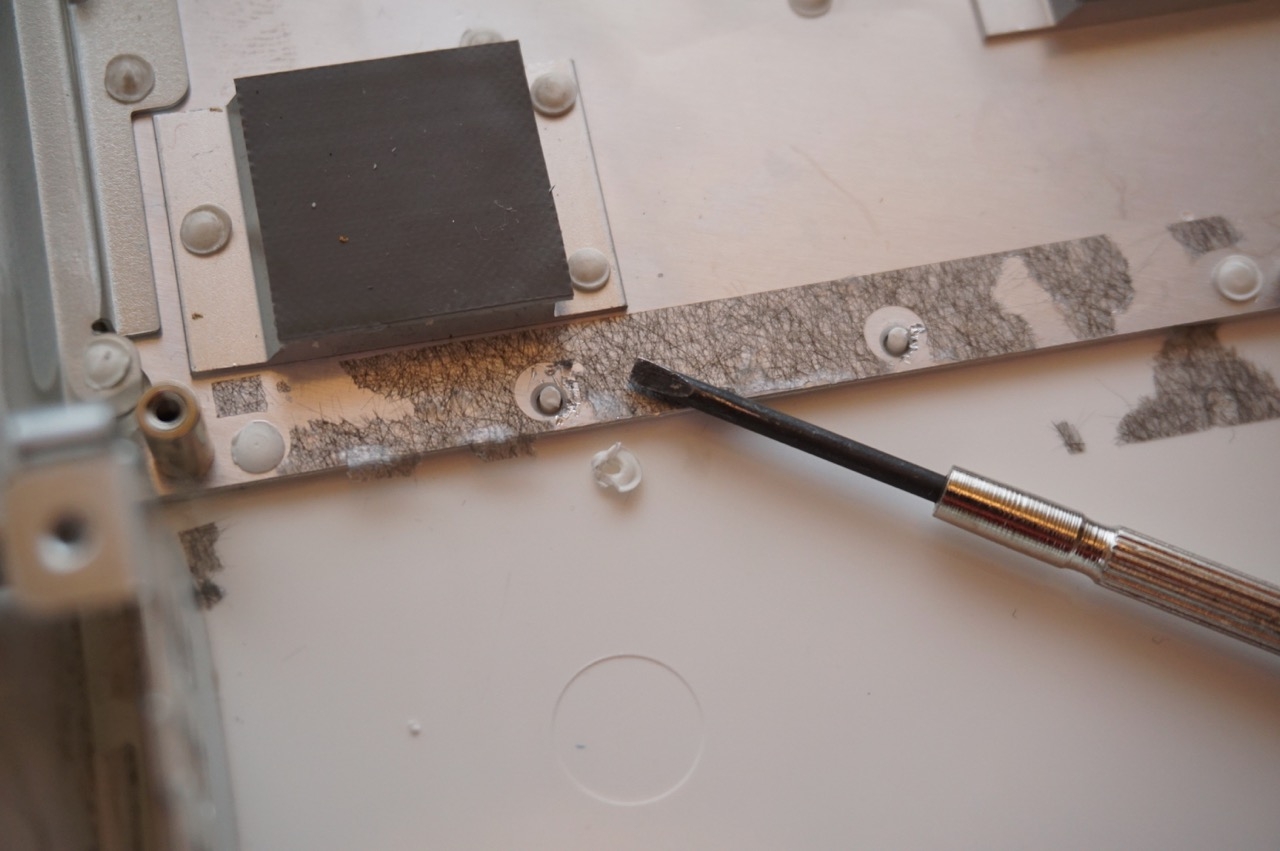
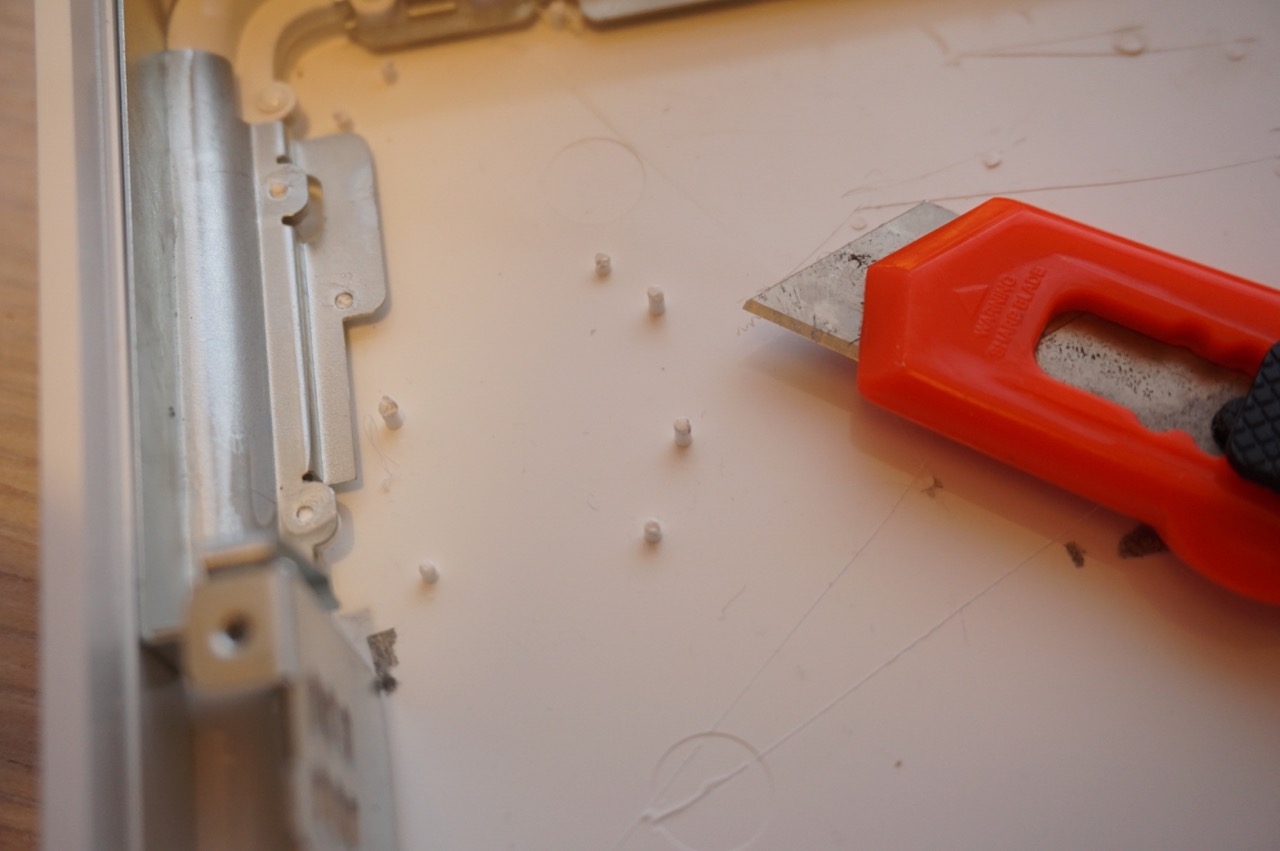
Note at this point: If you find it ok to load your iPhone in a horizontal position, you can save yourself the steps to come. Since there is enough plastic surface exposed to let through the Qi charging radiation, you could also install the coils here. But I wanted to put the iPhone upright, and that's why the rest of the metal has to get out. To do this, use a screwdriver to remove the plastic rivets that hold the metal plate. This is quite easy: just brake them off.
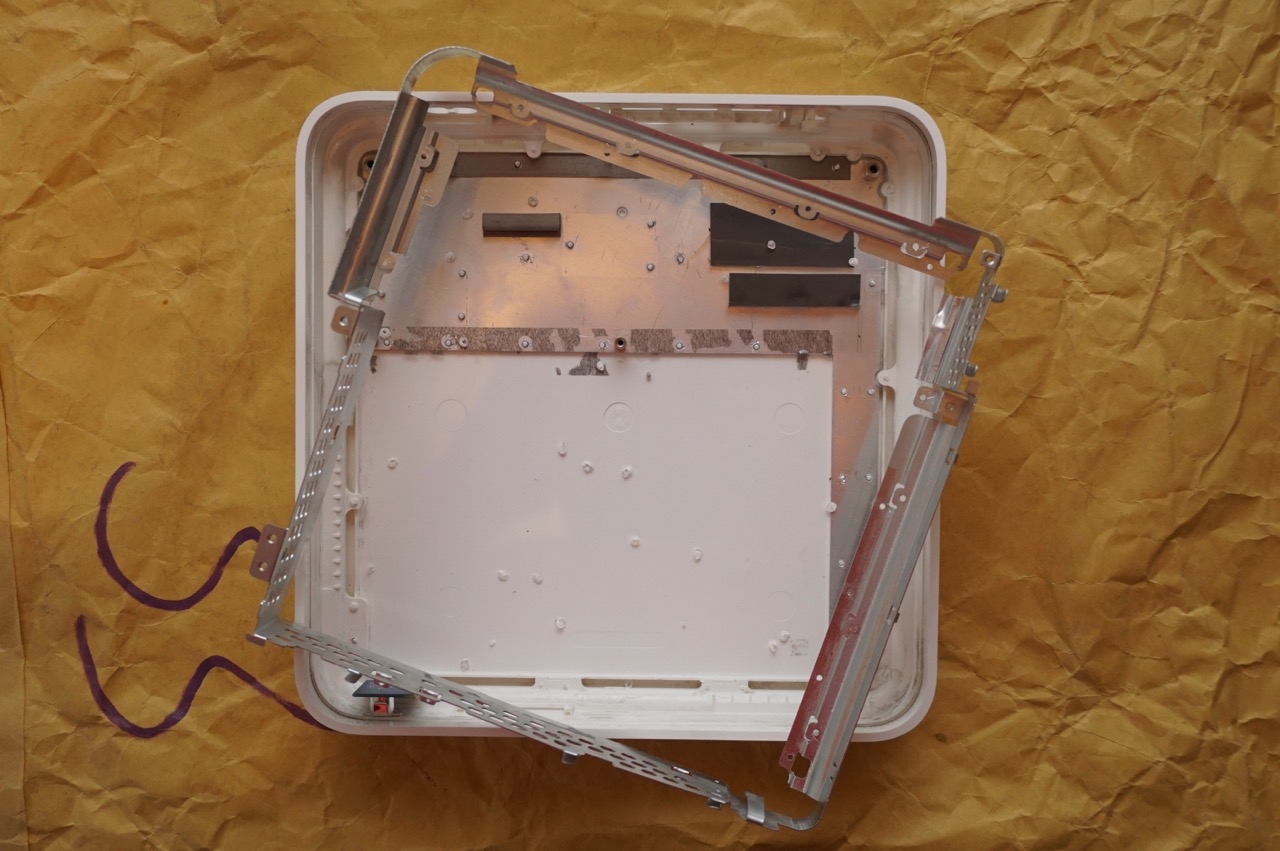
So in the first step, the frame can be removed (we will need it later) and then the metal plate, which has served as a heat sink.
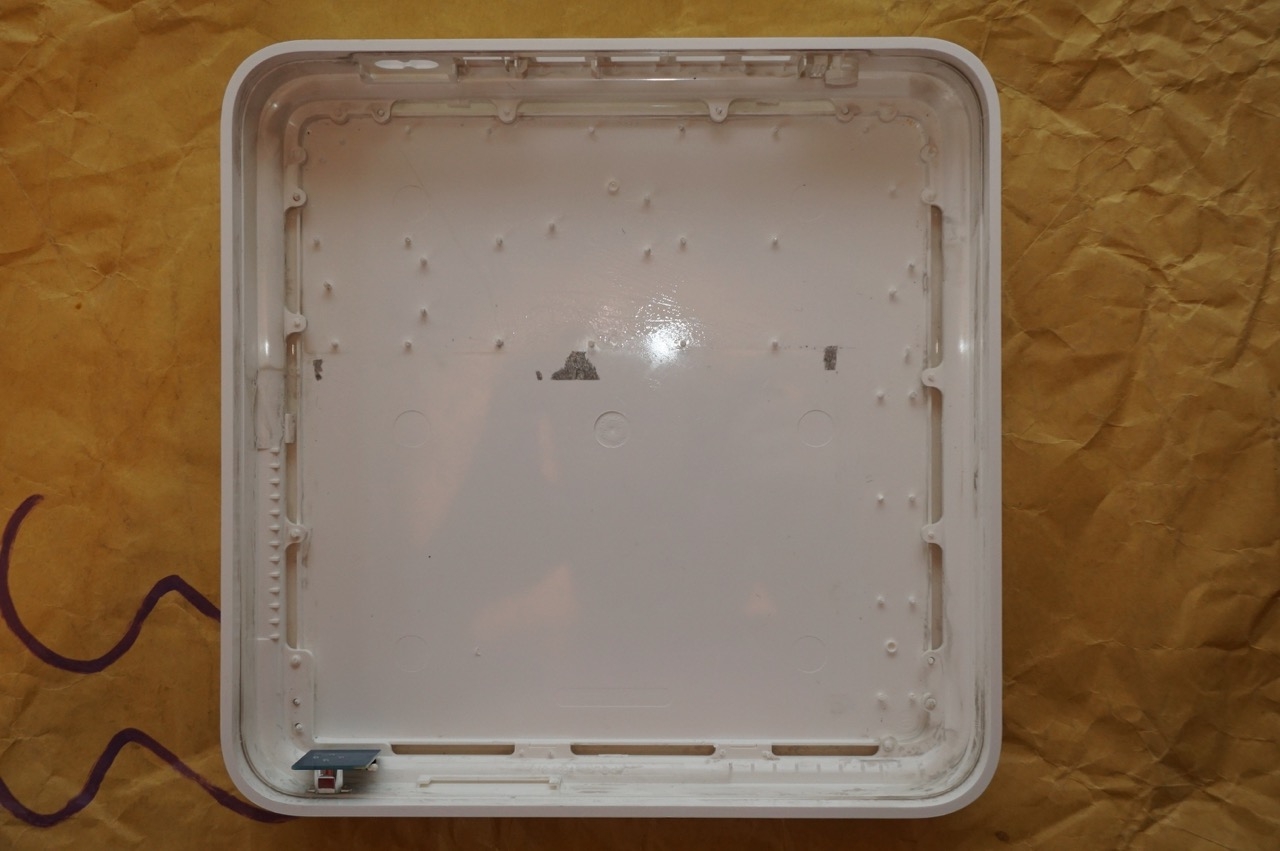
Now remove a few smaller upstanding plastic noses
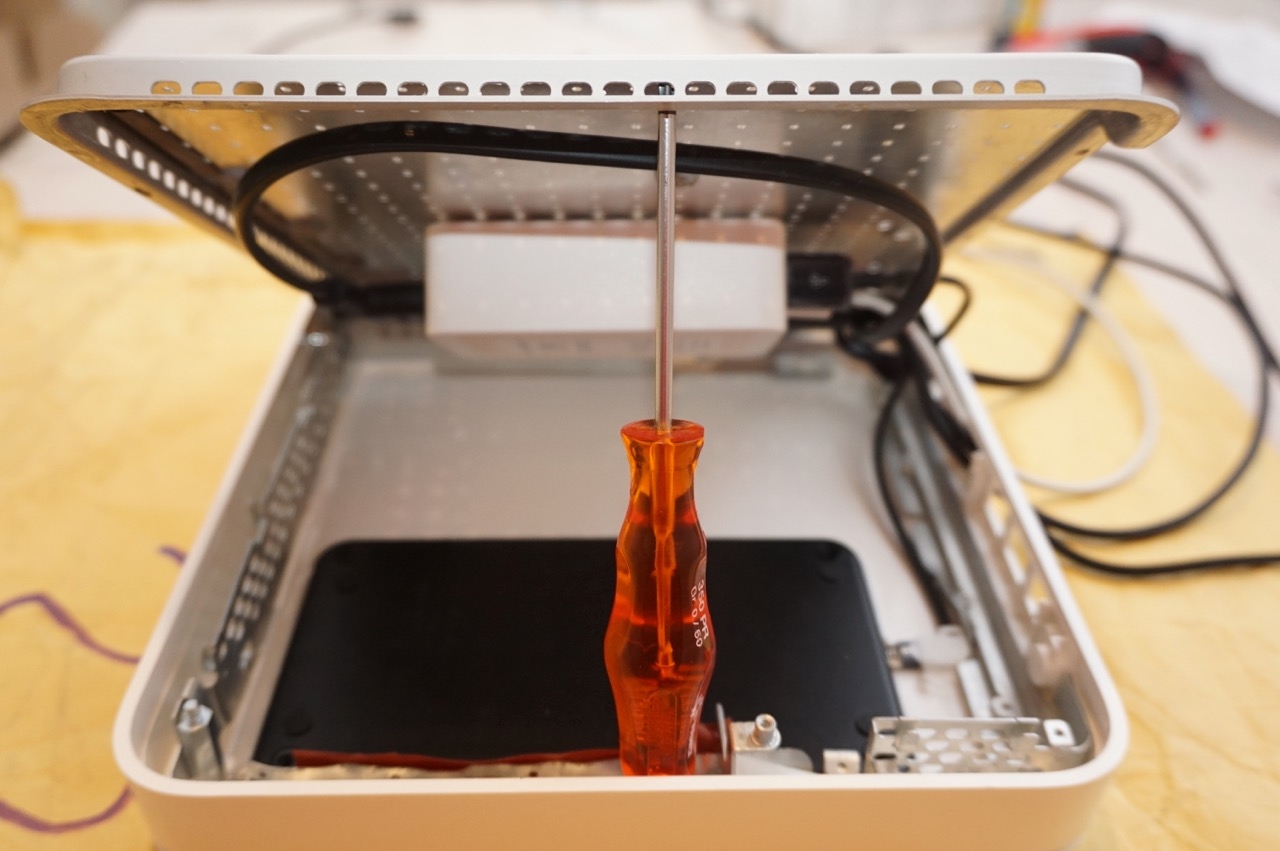
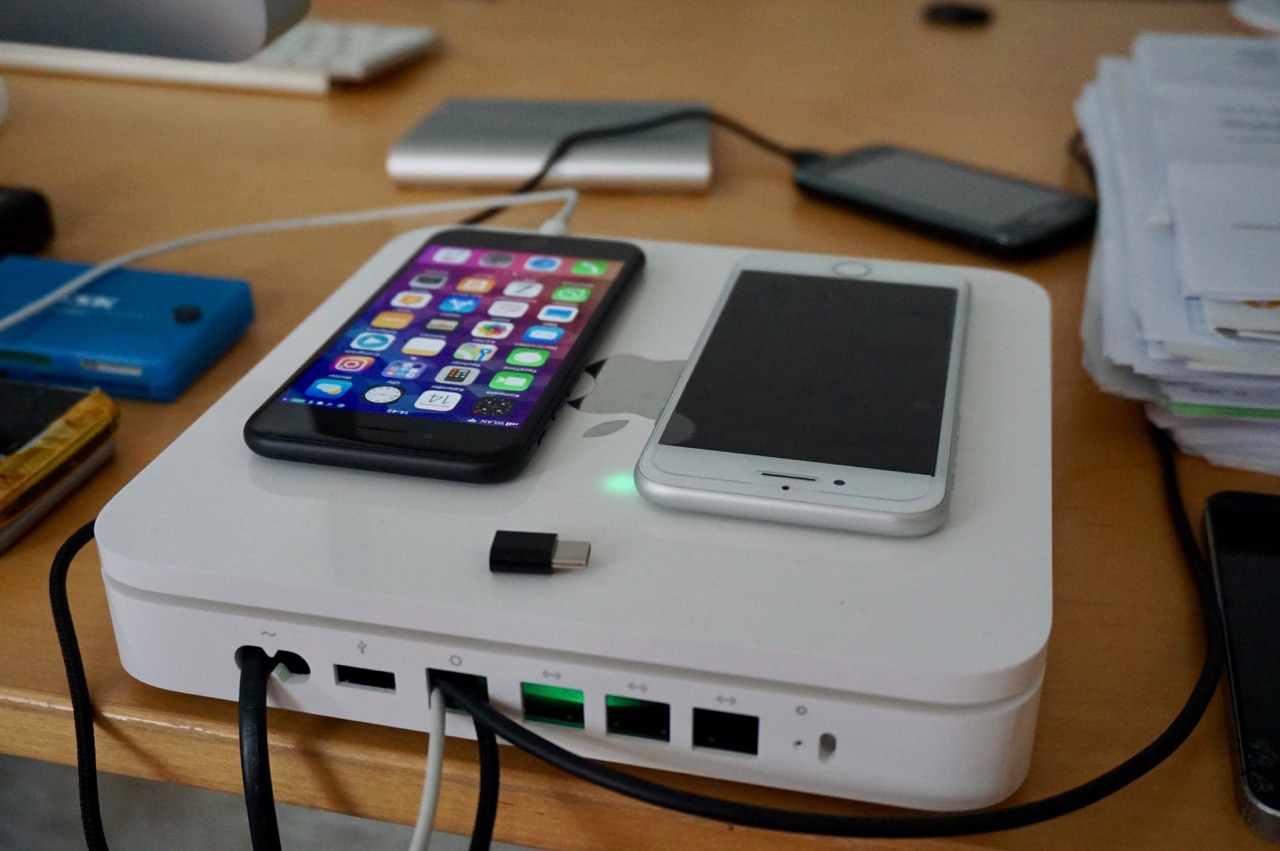
Now we can do the installation of the Qi charger. We decided on the Vinsic Qi charger with three coils. Although it charges with only five watts it has the advantage that it has three coils, so that it covers a larger area and you do not have to pay attention when placing the iPhone so that it is precisely positioned. Of course you can also use another one. We're not changing the charger any further, just remove the top plastic cover because the new top cover will be the top of the old time capsule.
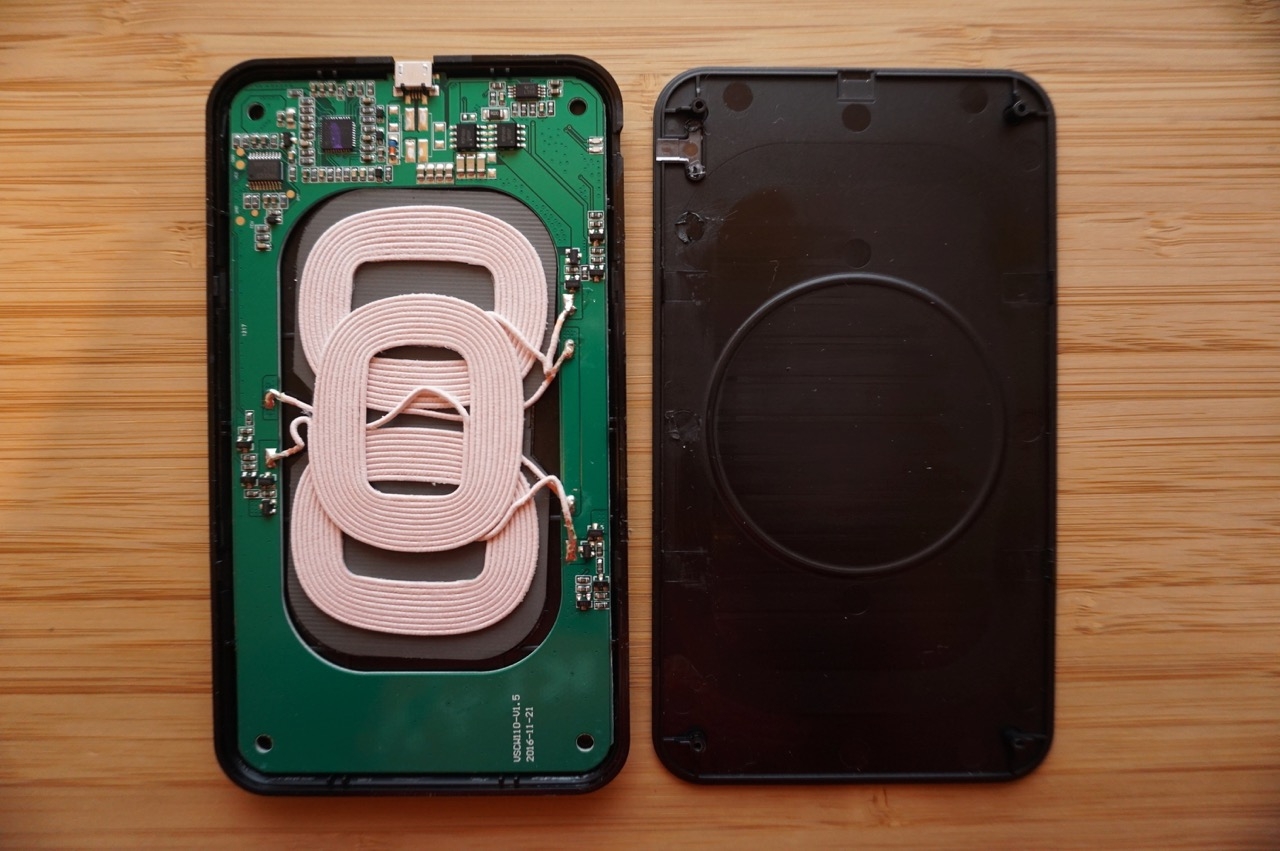
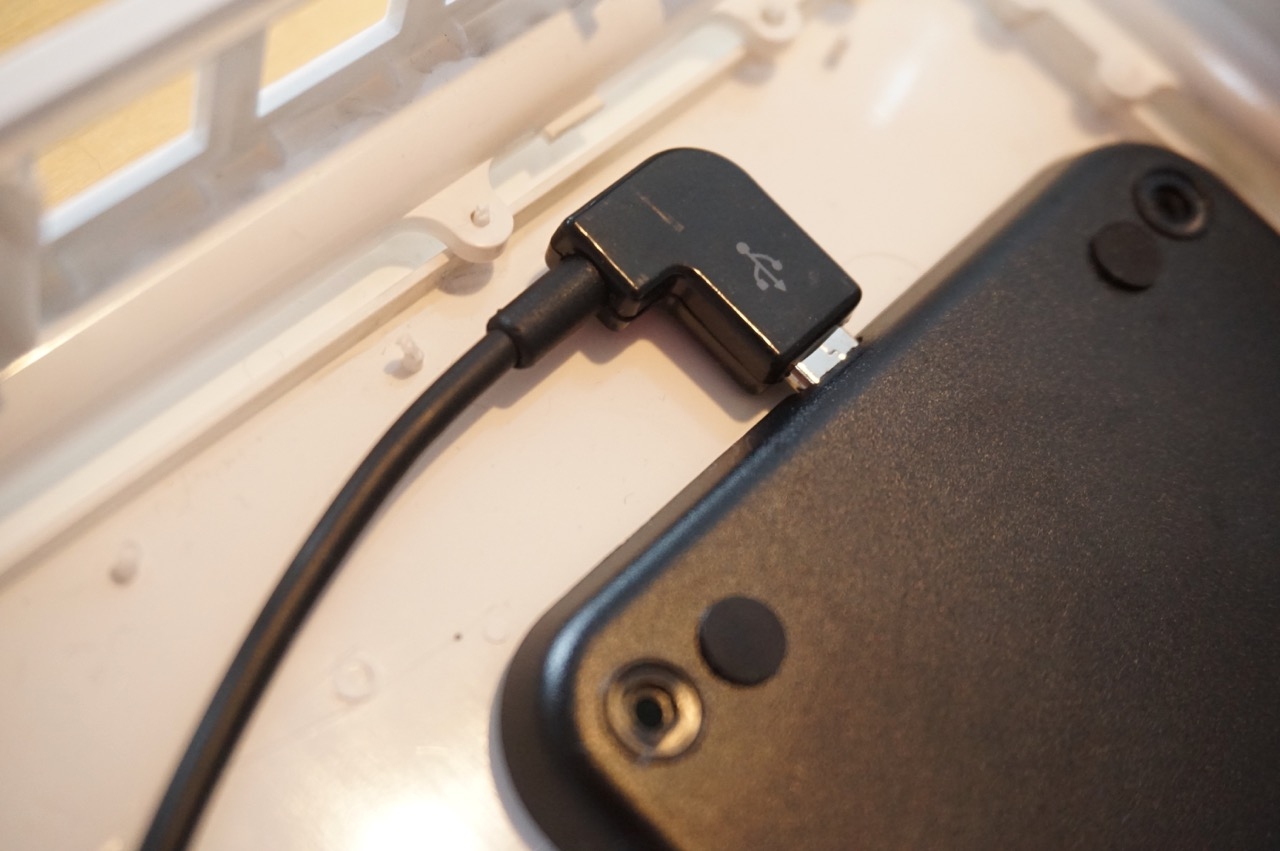
Now it's time to fit the charger. Use an angled Micro USB cable, so that everything fits well.
On the right side (if the Time Capsule is later turned upright again the Qi charging field is on the left) are still a few of the plastic knobs. It has turned out that you can lift the case of the qi charger over them and they even keep the case in place.
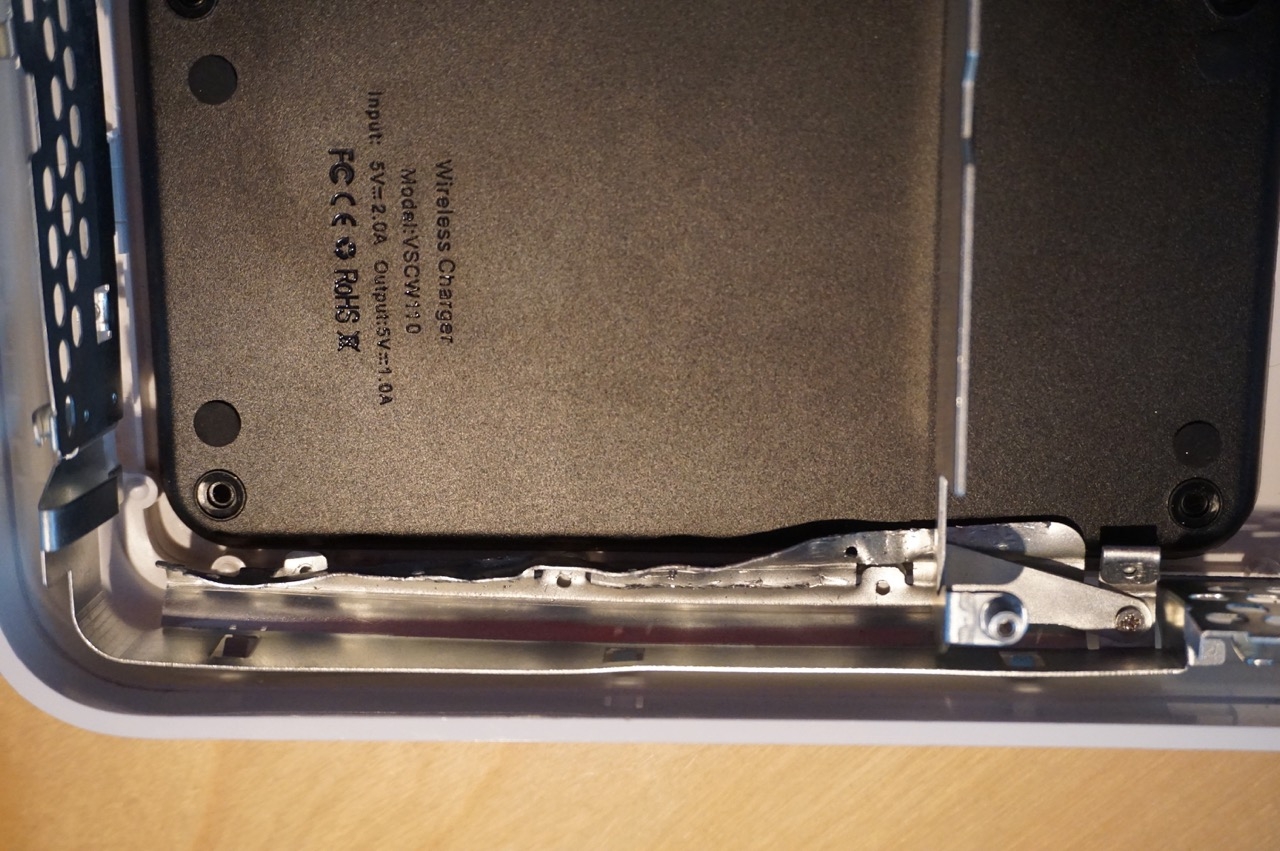
We must now fit back in the sheet metal frame so that we can screw back on the floor later. One problem is that the Qi charger housing is a bit too high and the frame touches it. So we just bend the part a bit with pliers. Does not look that elegant, but it does not matter in this case, as it's all about creating some space.
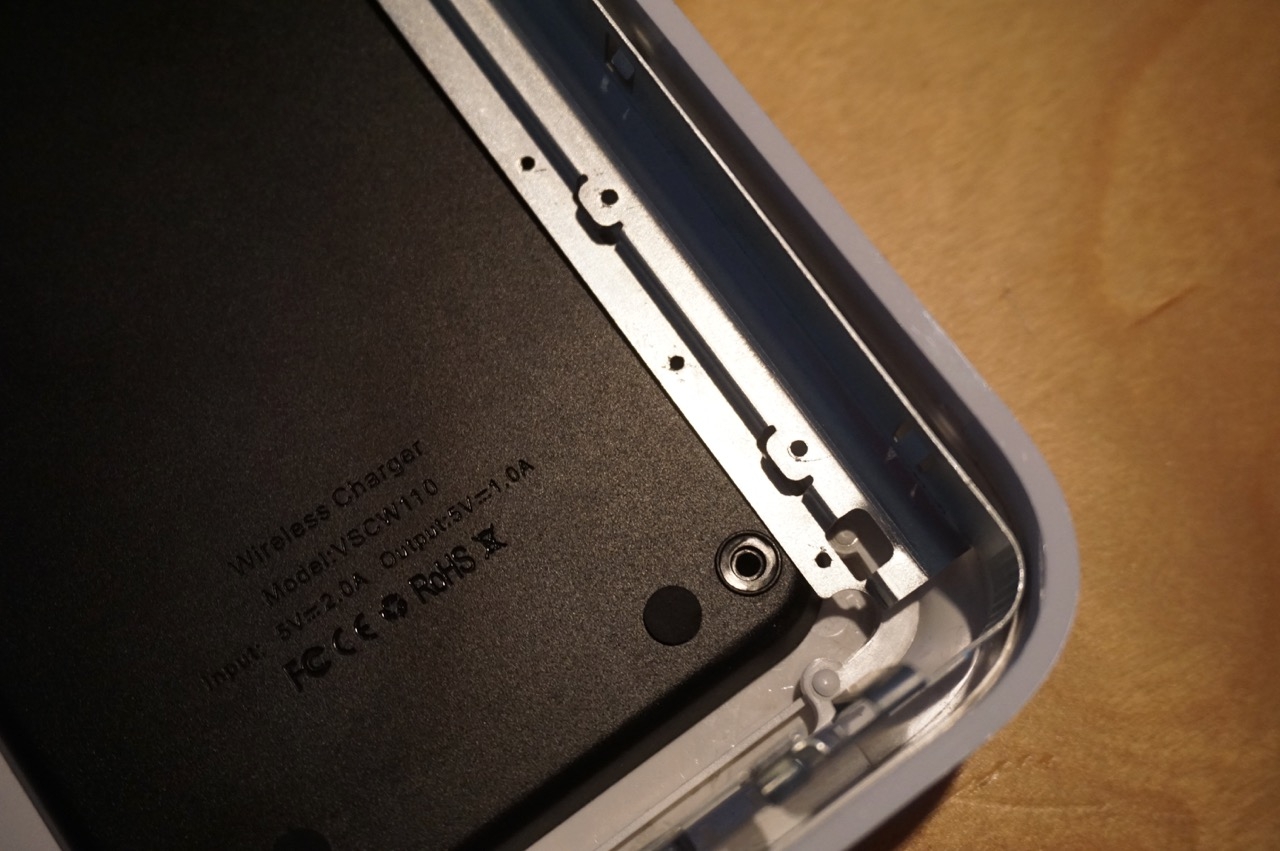
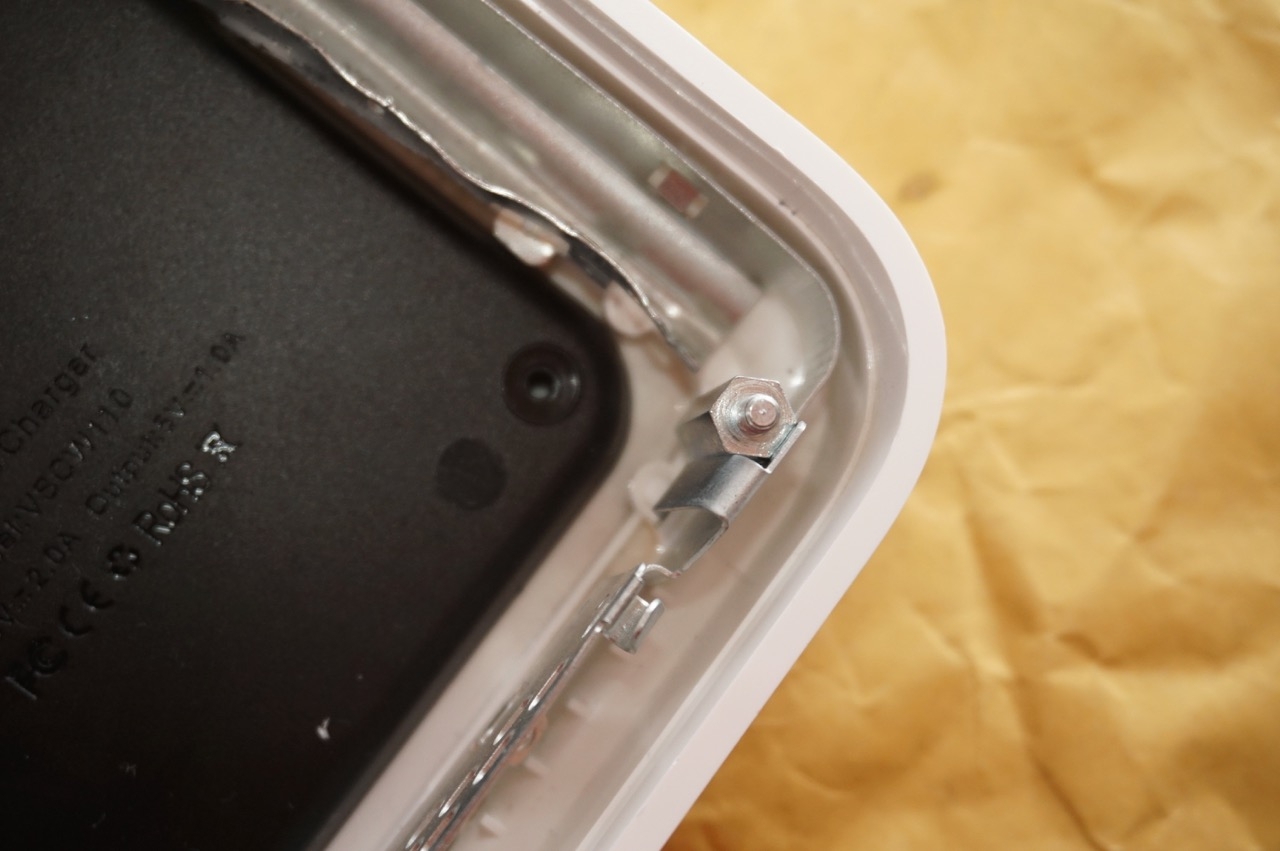
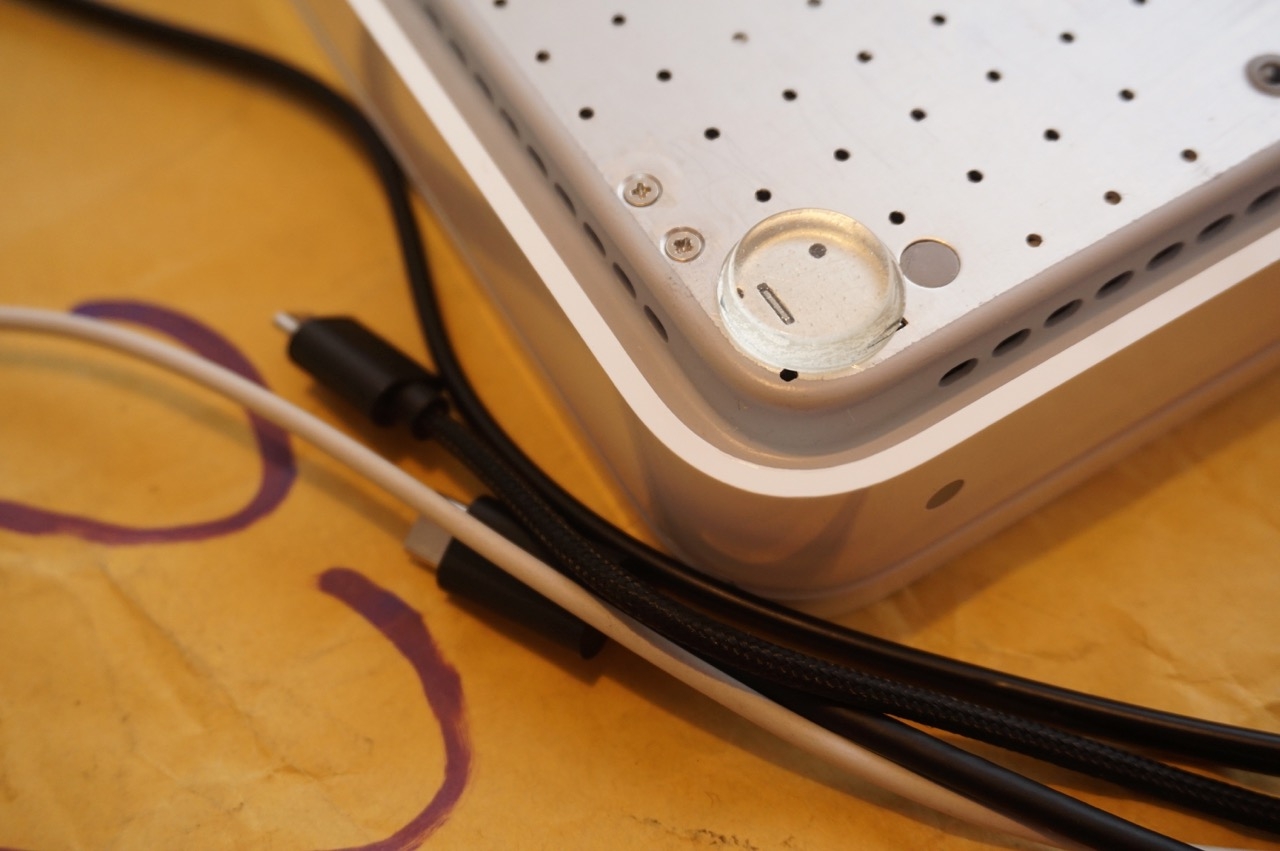
Then we break off the right part with the small stud from the metal bridge that was removed at the beginning and screw it back to the old place. This is necessary so that later we have a counterpart to screw the bottom plate again.
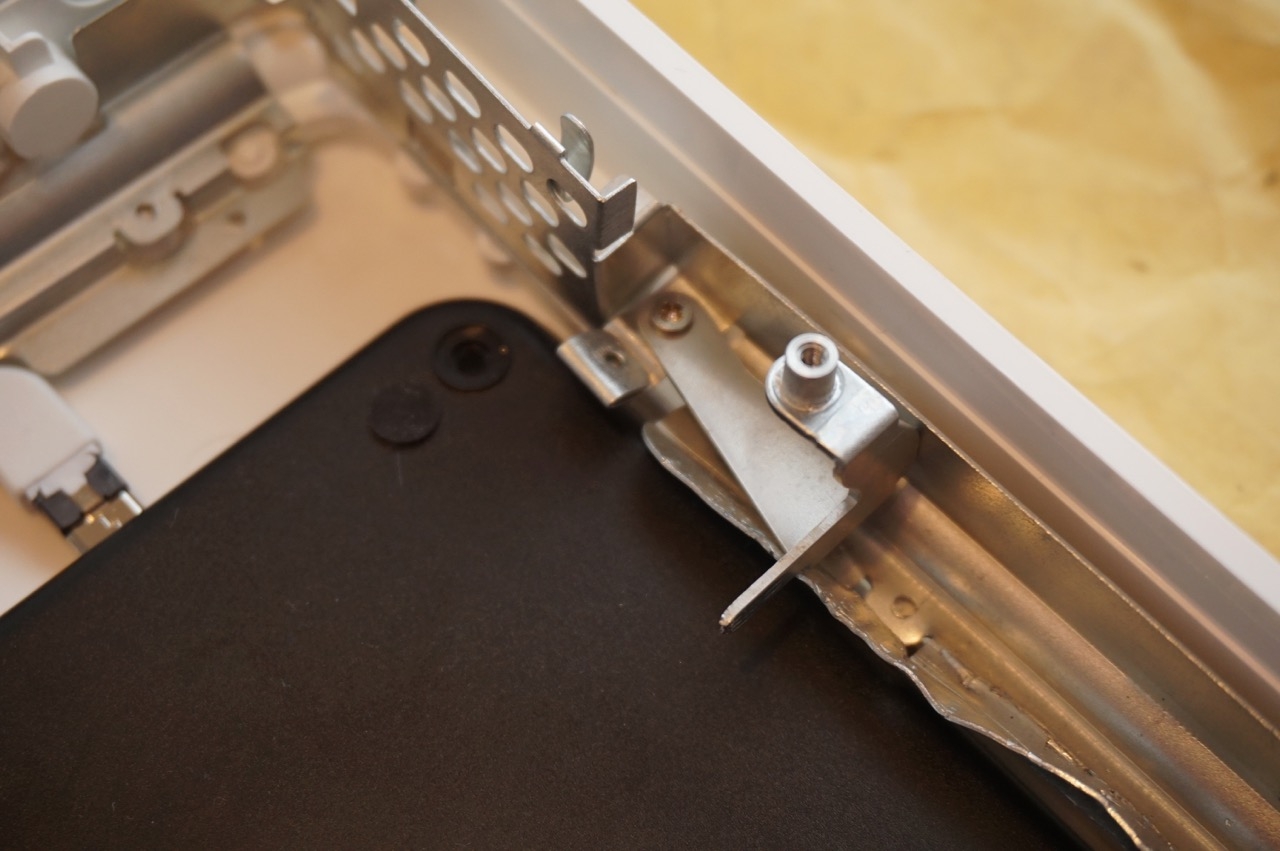
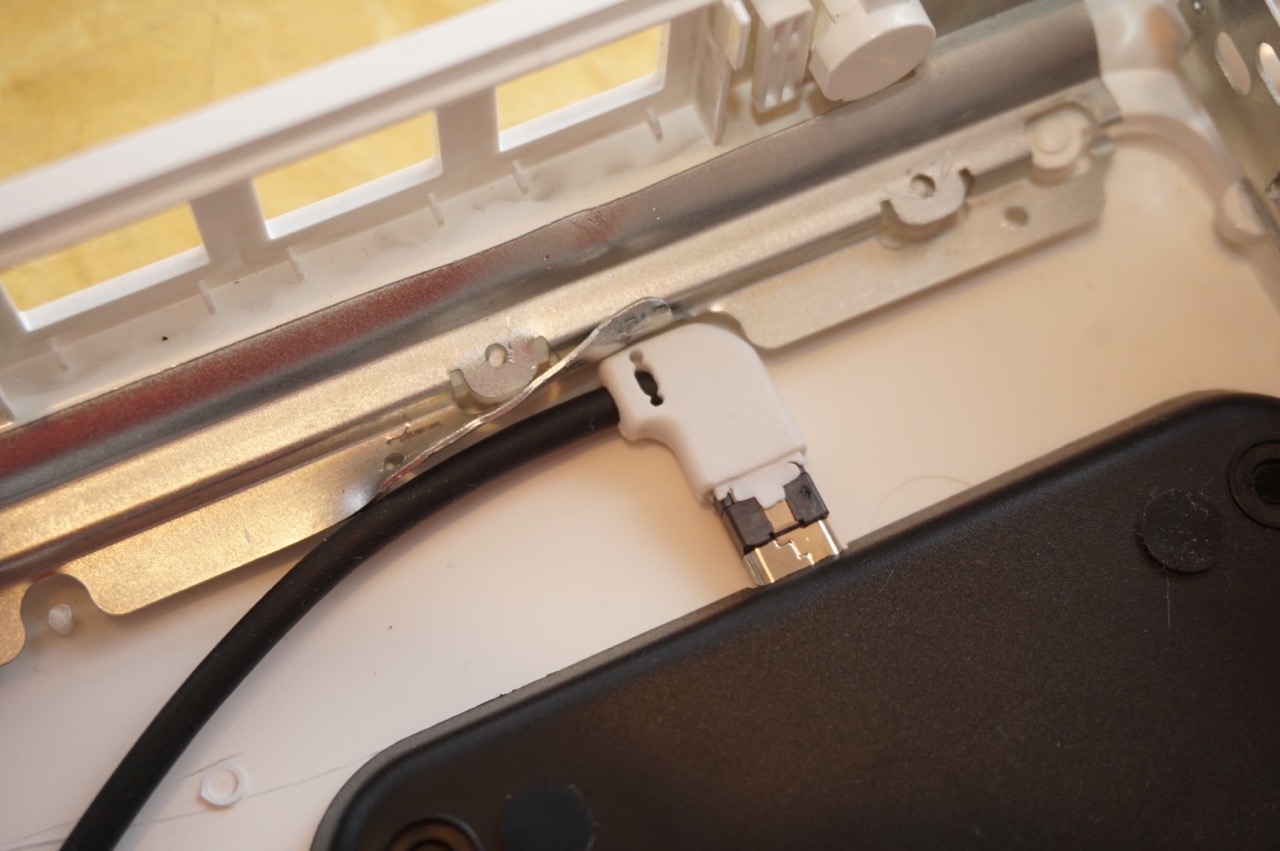
We also need to bend the frame slightly where the Micro USB cable is located. In addition, I have removed the housing of the connector, so it is flatter.
Since we have removed the metal plate, we can not tighten the studs later. So, just stick it back on in the top left corner (near the old power plug) and in the bottom right with superglue as a spacer. Try a little bit beforehand and determine the height you need. Just look at the rest of the frame, put a ruler over it and glue them at the appropriate height.
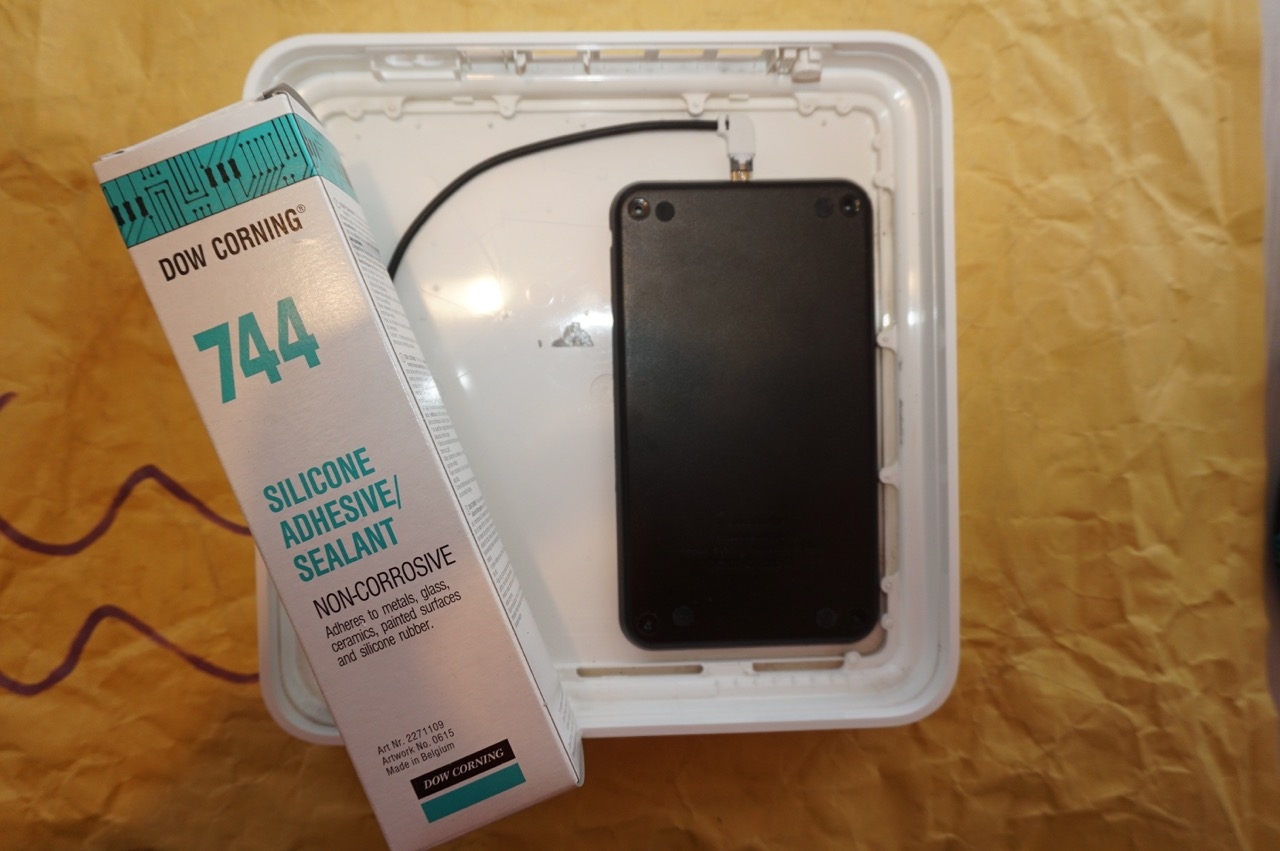
Now we can glue the Qi charger into the Time Capsule with a silicone glue and also try out whether it works like we thought it would. And yes, it works! Also glue in the metal frame. You can also use superglue.
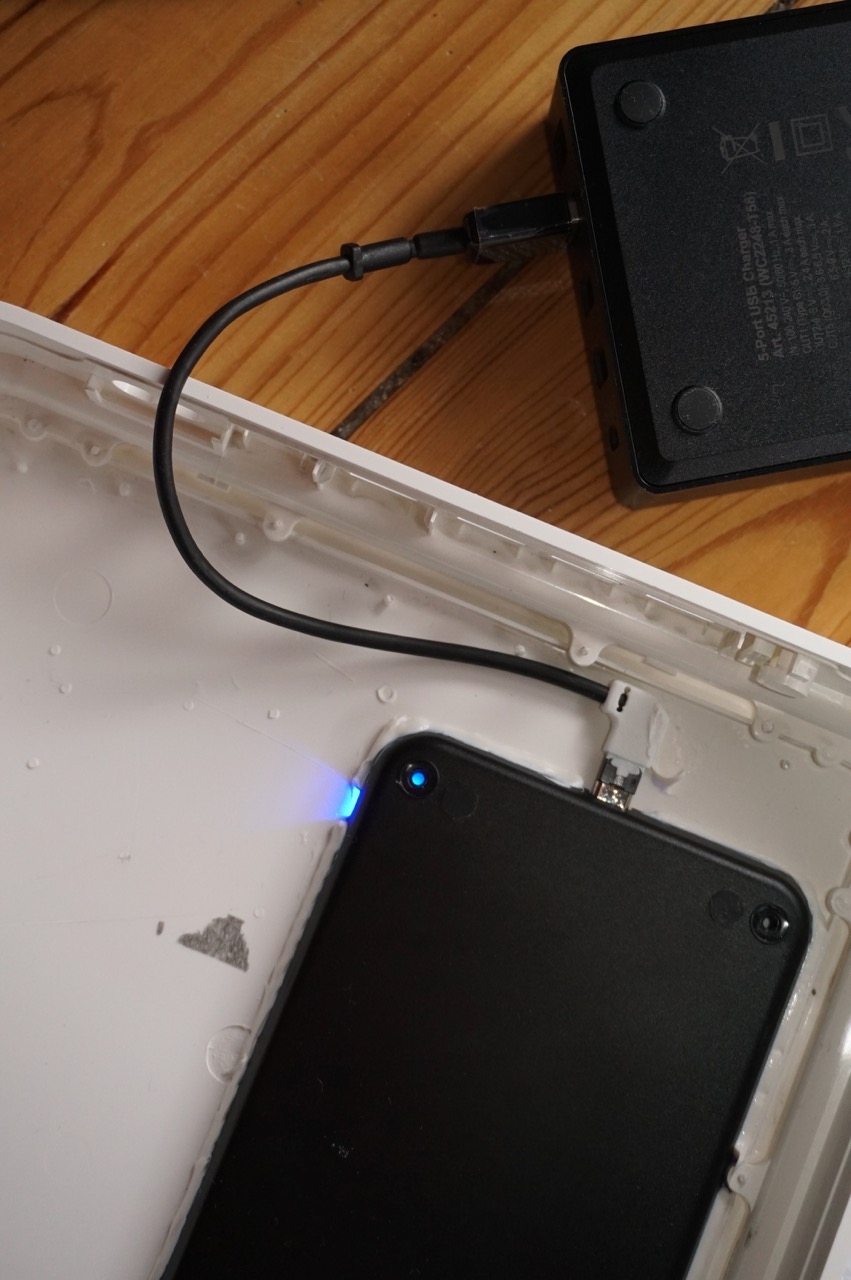
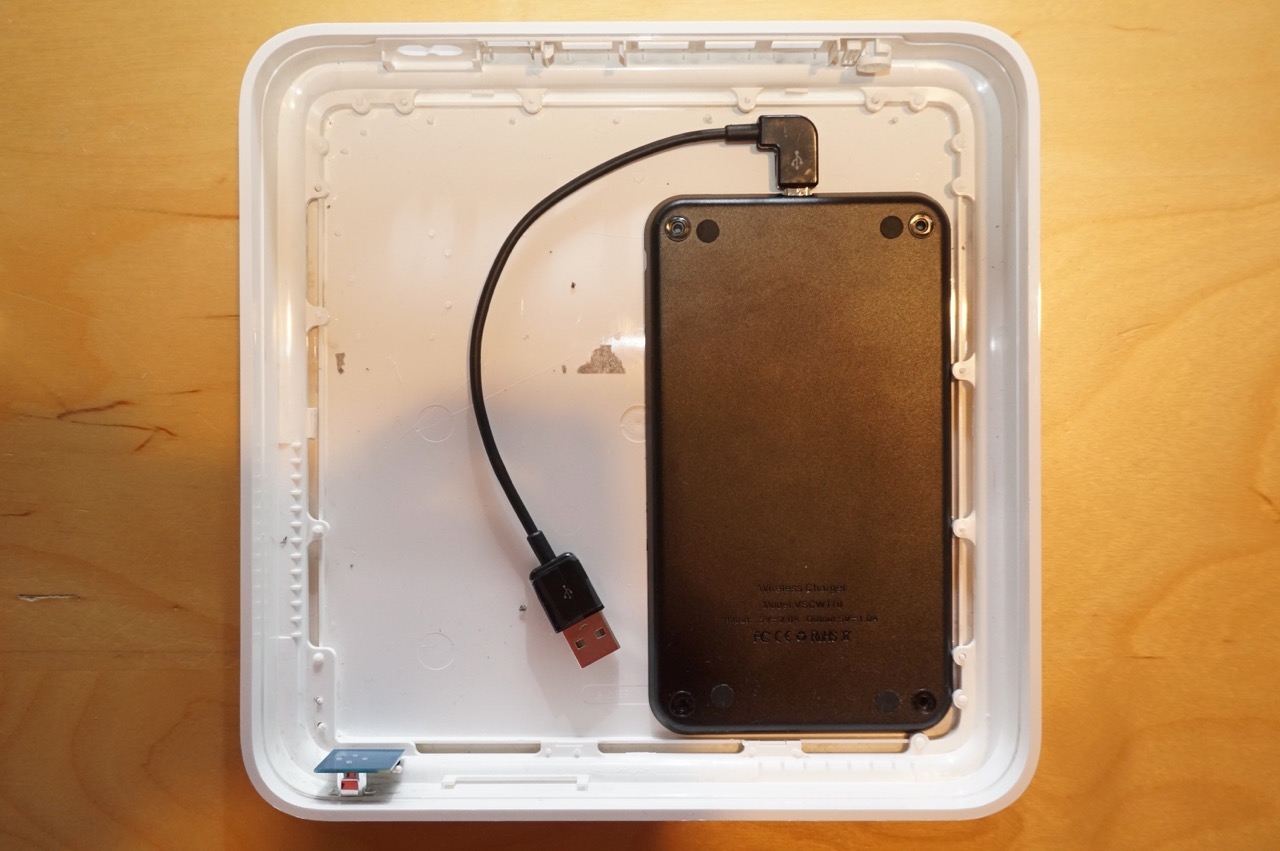
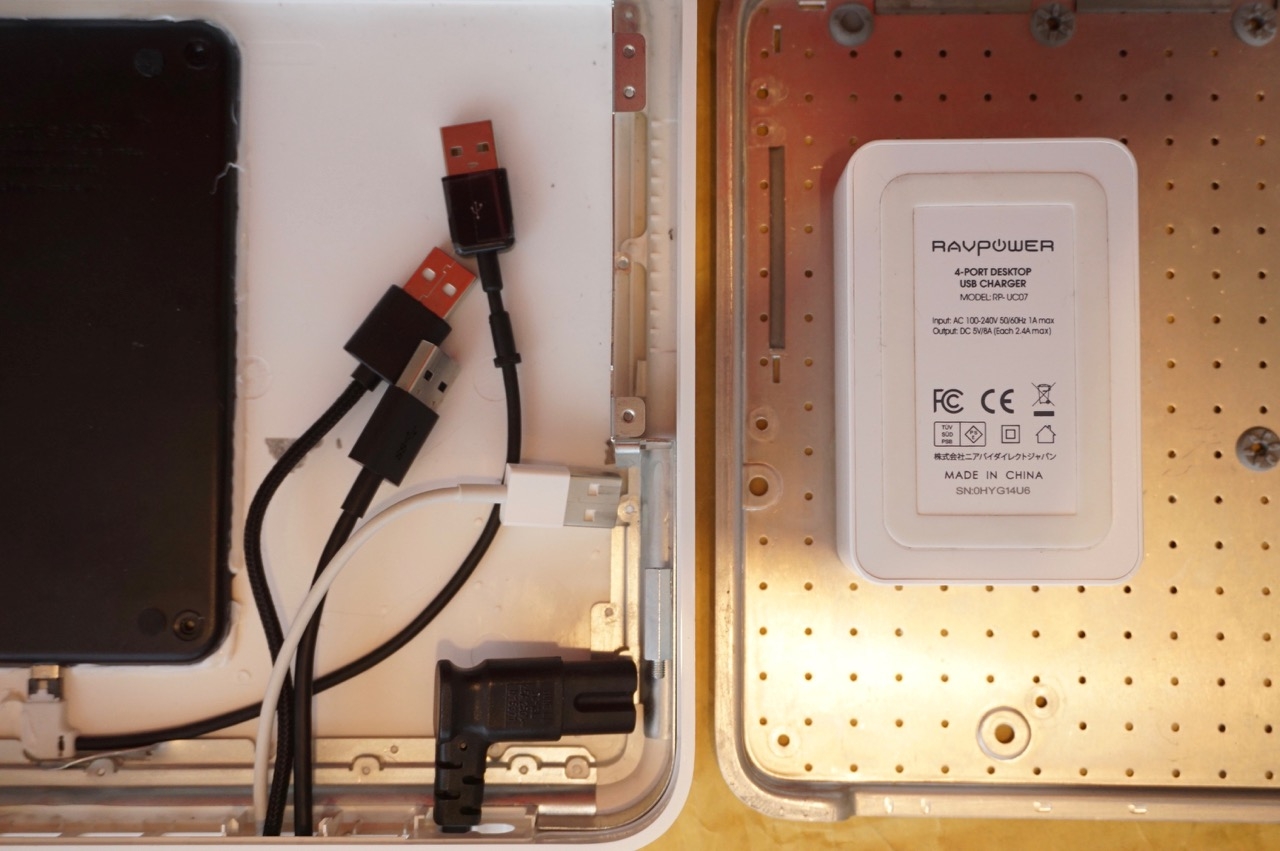
Now it is time to install a power supply for the Qi charger. We decided on the four-port charger from RAVPower that will be placed in the case accordingly. Necessary was an angled power cable, otherwise it would have been a bit too tight.
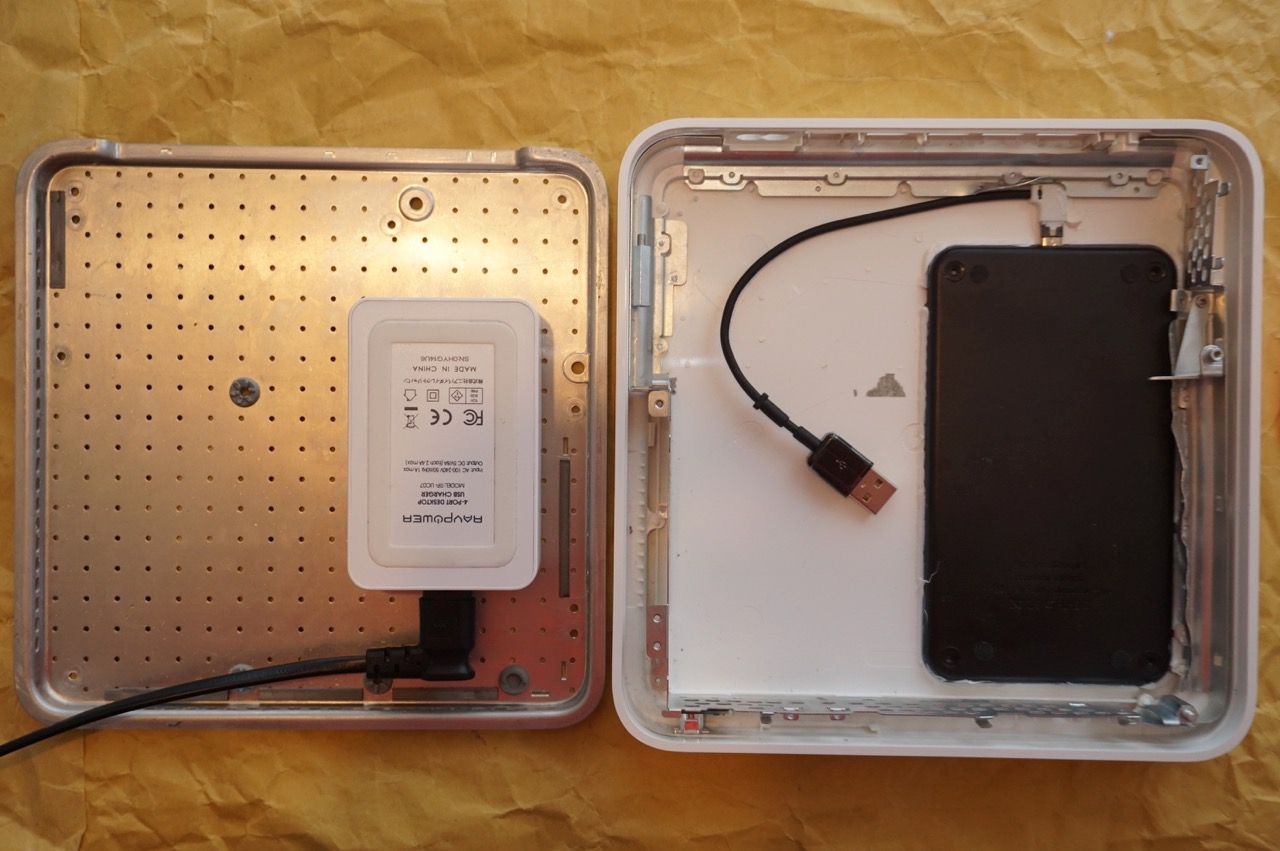
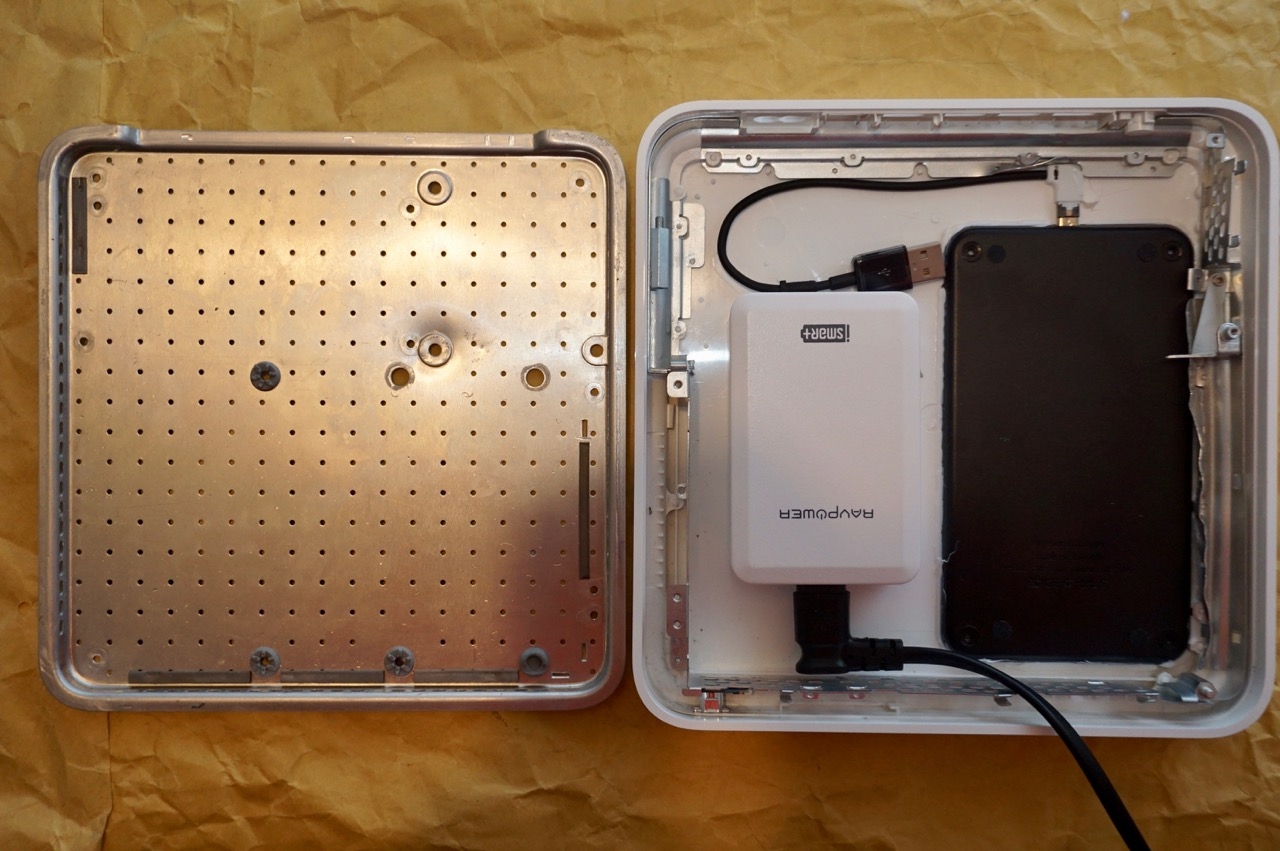
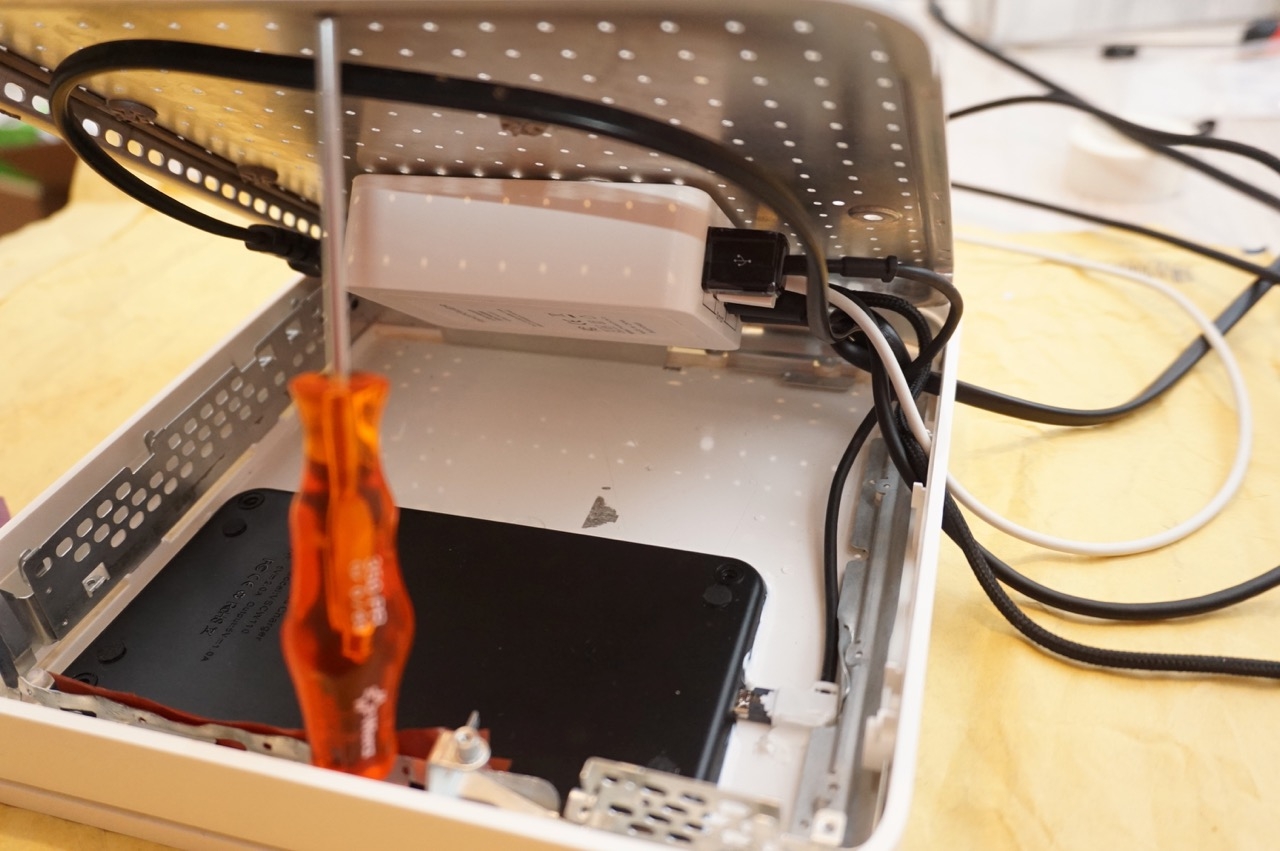
Since the metal floor is later on the bottom side, it makes sense to attach the power supply to it, so gravity can do its thing. So try a bit an and find a good position. Unfortunately, the bottom of the Time Capsule has a small elevation that we have smoothed gently with the hammer. Then you can attach the USB power supply with double sided heat resistant tape.

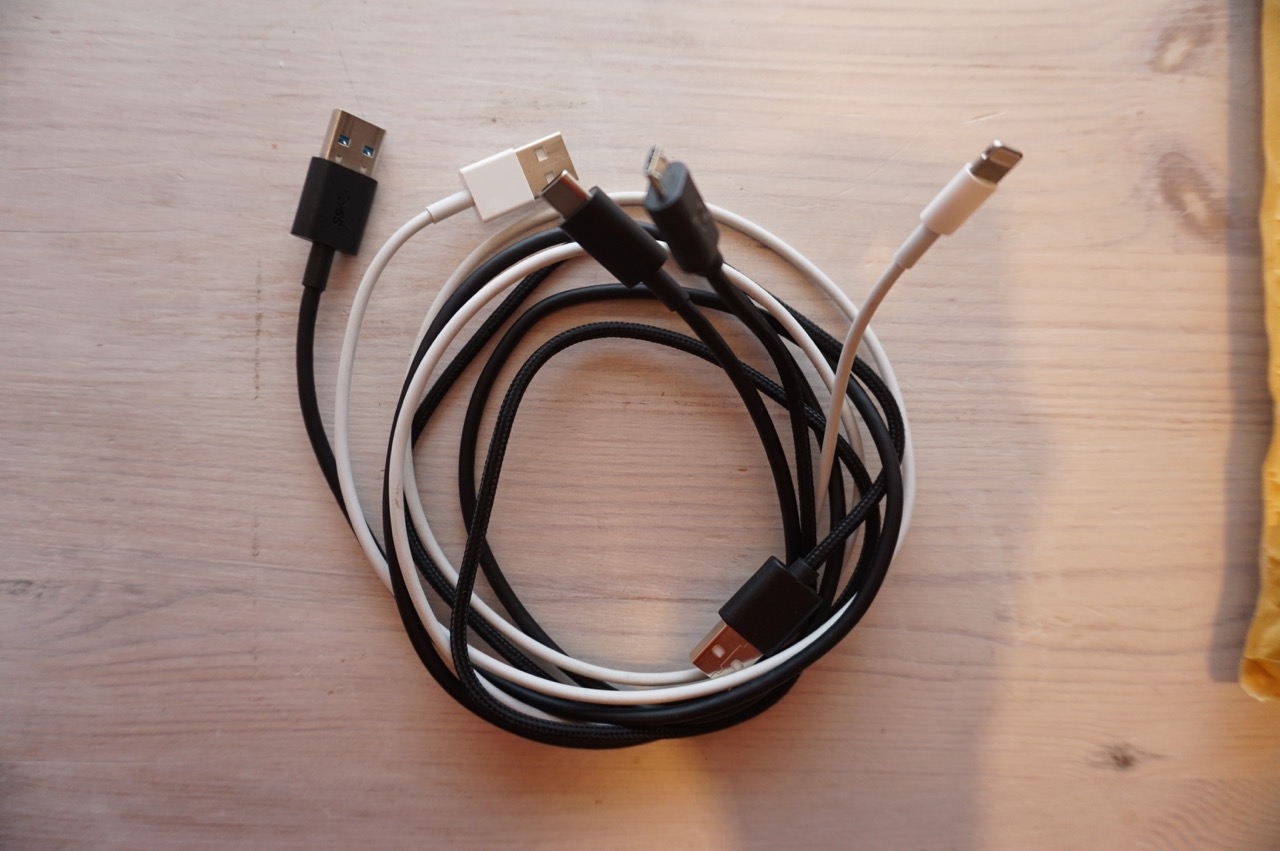
Now we do the wiring. For the Qi charger, we already have a micro USB cable. There is also a lightning cable for iPads and older iPhones, a micro-USB cable for battery packs and Bluetooth speakers, etc., as well as a USB-C cable for the MacBook.
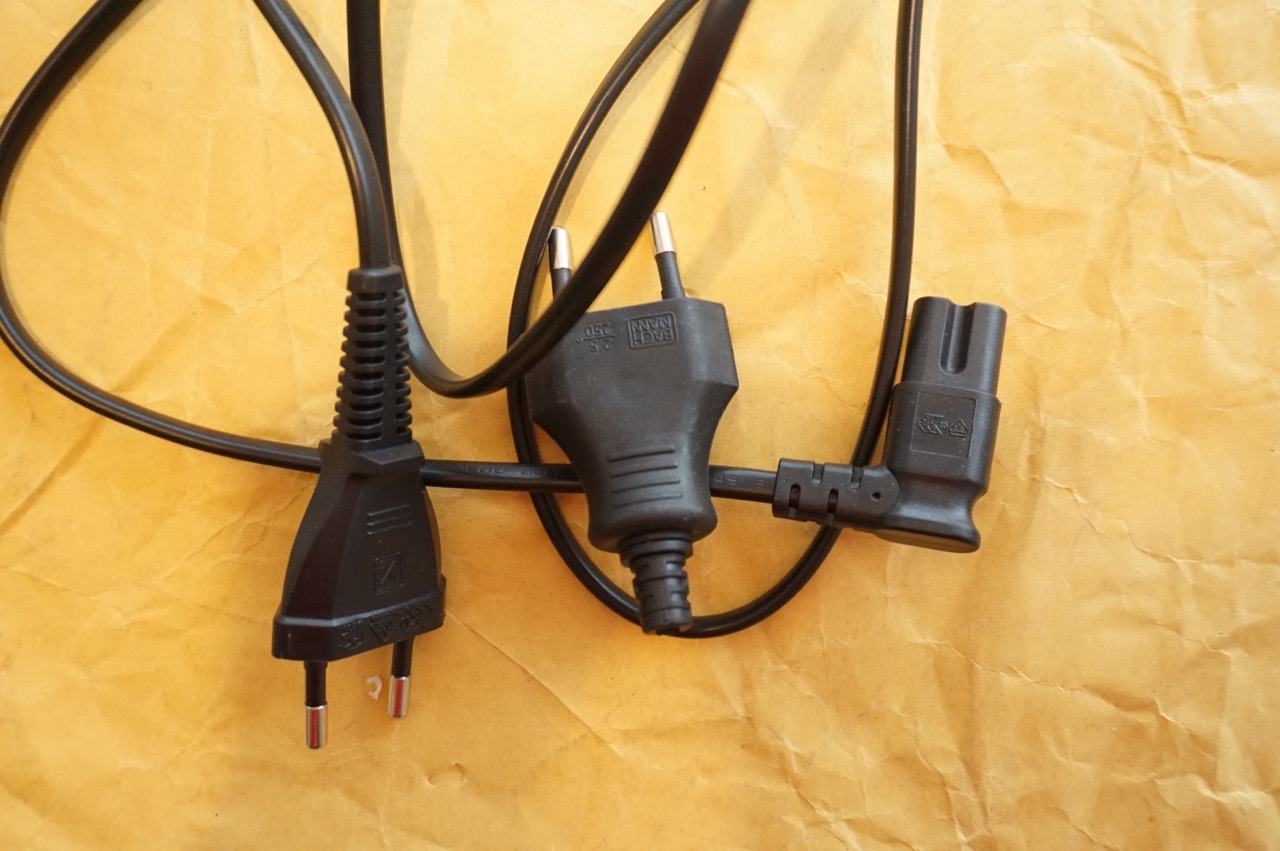
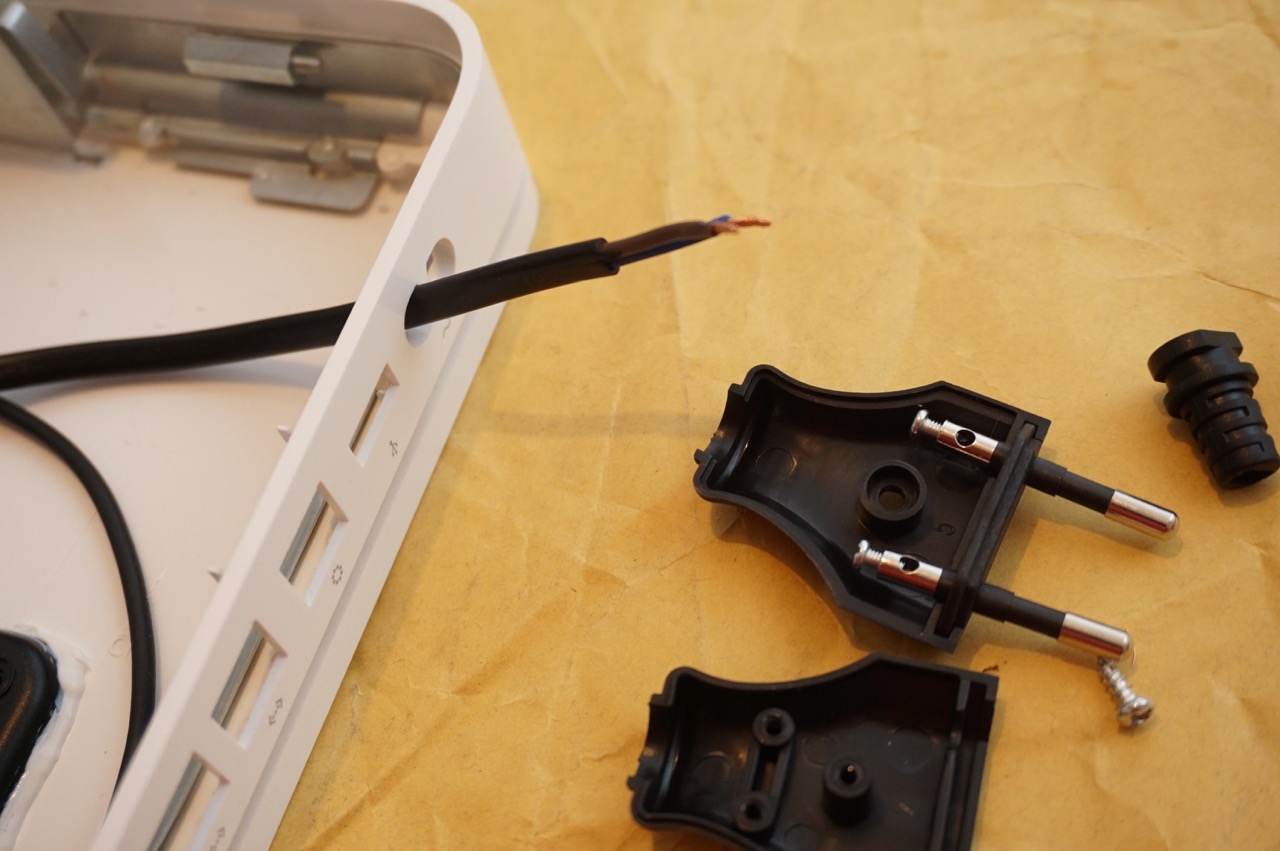
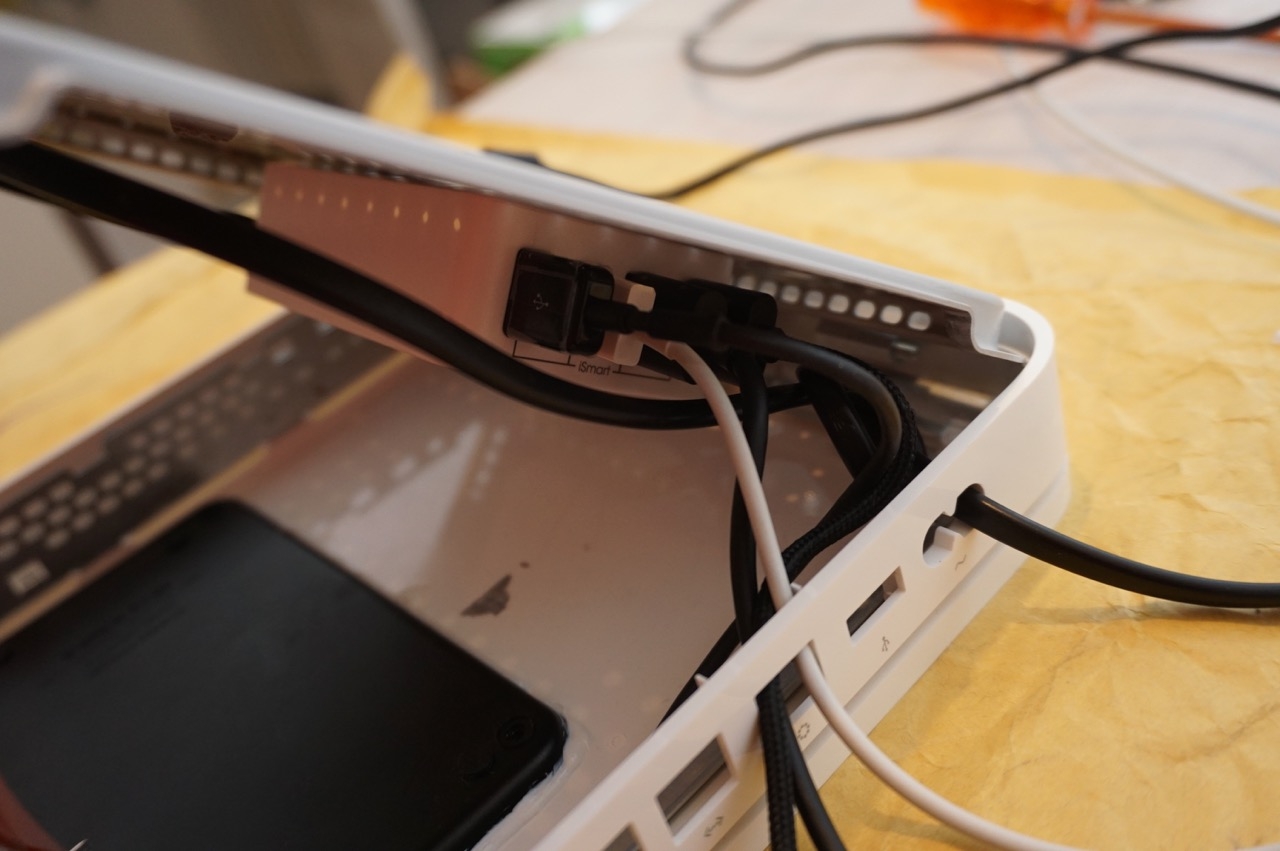
First, however, the power cable must be adjusted. Since I did not want to cut any further opening in the Time Capsule housing, all cables must fit through the existing openings. With the smaller cable, this is easy, only the plug of the power cable is too thick. So just cut it off, put it through the appropriate opening and then screw a suitable plug back on.
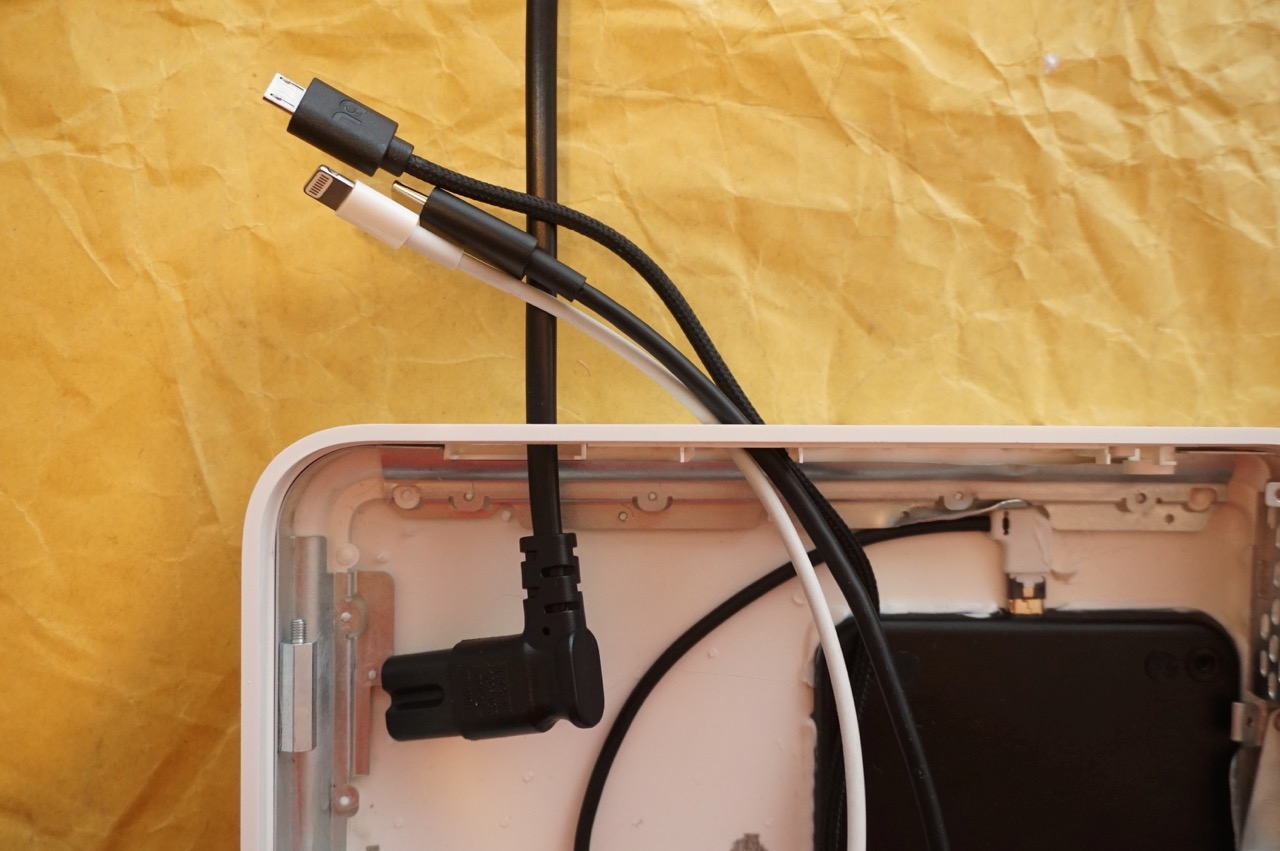
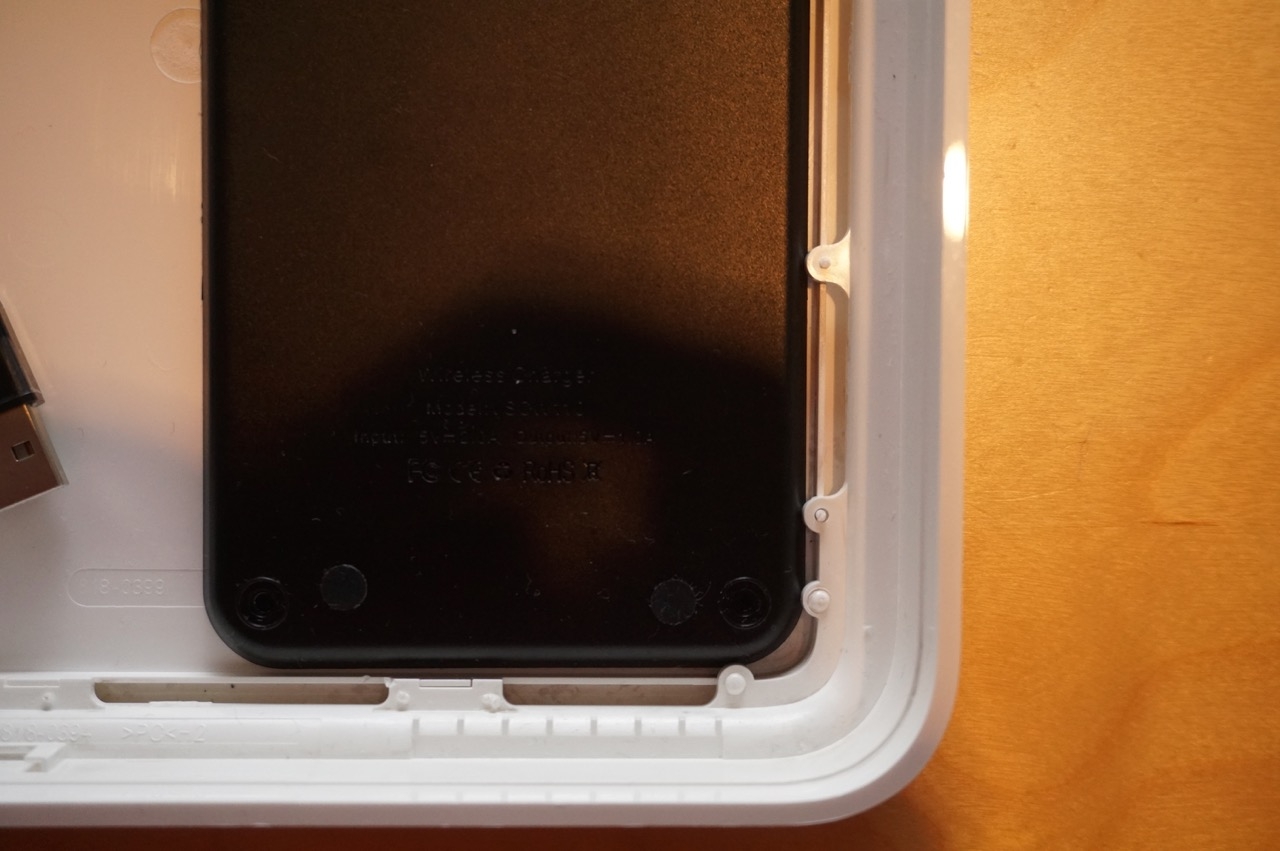
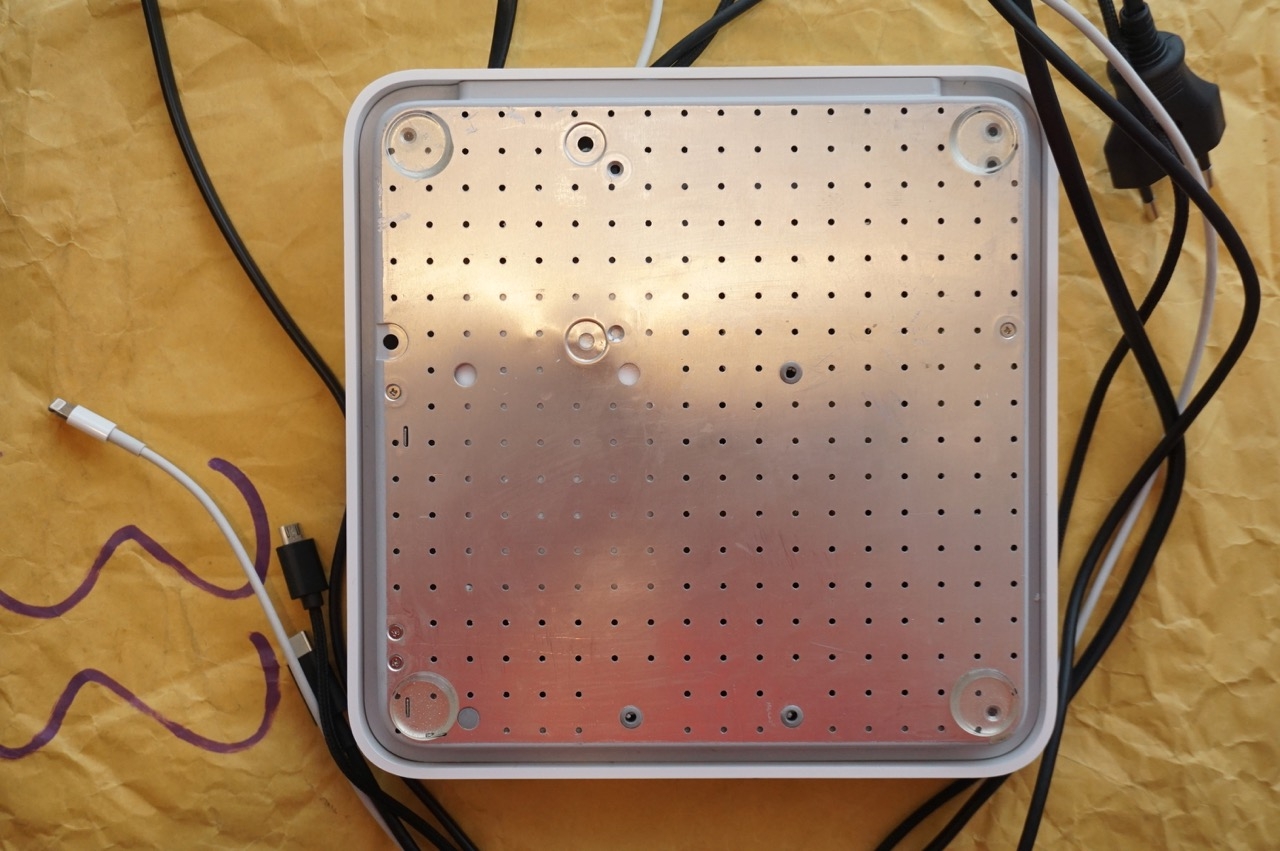
Now all the necessary cables are in the housing and the USB power supply is glued to the bottom part. Now you have to put the two parts together and put the cables in the ports of the power supply. Make sure that nothing is squeezed and there is a bit of order inside.
It is a bit fiddly, but after a few minutes, everything should be arranged in way that you can completely shut the bottom plate without any problems.
Since we have removed many parts, you can not use all screws again for fixation. On both sides, however, a few are present and the glued bolts should keep the appropriate distance. Since we have no heavy components such as a 3.5 "hard drive anymore, that should not be a problem. Replace the removed rubber base with some new rubber feet and you're done!
The homemade Qi charger looks very elegant, works great and also charges other devices, we did, after all, just hide a USB charger in a Time Capsule enclosure. It's even enough to keep a 12 "MacBook charged during operation or to charge overnight - extremely convenient.
You can of course customize your replica: the whole removal of the metal you can skip as mentioned, if you want to charge the iPhone in landscape mode. Or you can build in two Qi chargers, one on each side. Or a power supply that has a USB-C port and 45 watts for larger MacBooks. Or, or, or ...
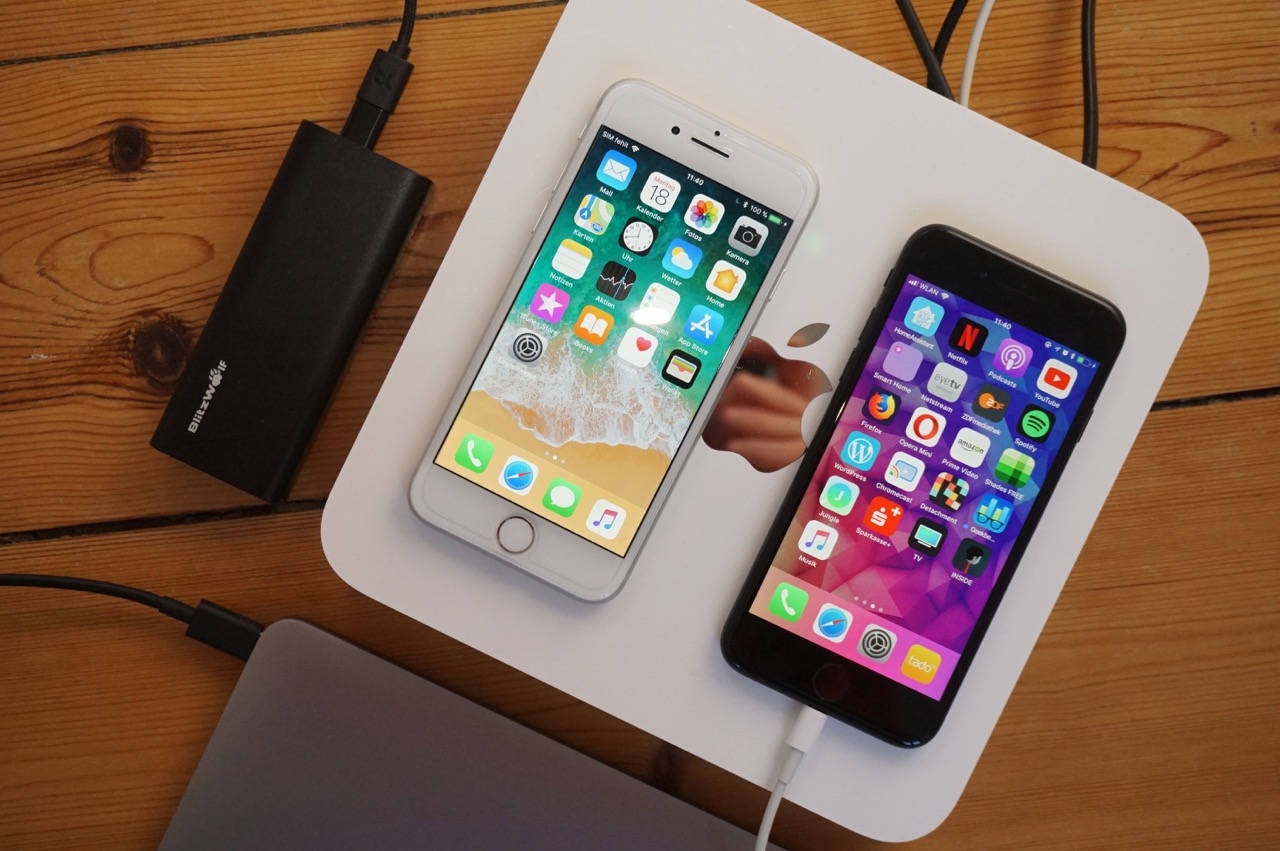
The limiting factor inside is the height: it is about 3 cm. Power supplies that are higher do not fit into it. Have fun copying the idea and show us your results!